¶ Apps Code
The Apps Code page lets you add custom app (or "user app") code to your hub. It can also be used to modify or remove existing custom app code. Many users use this page to add custom app code written by others (the Hubitat community has developed some great apps to help you automate your devices in new, cool ways!), while others use it to write or or copy in code they have written themselves.
NOTE: Third-party code is not offically supported by Hubitat. Support may (or may not) be provided by the developer.
¶ Installing custom apps
-
If you are using code written by someone else: the developer of the app will normally post a link to their app code and often provide instructions for adding it to the hub. (If writing your own code, proceed with the next step.) If the developer did not provide explicit instructions and you wish to use this code, here are some general tips:
- Often, developers will use GitHub to host code. When copying the code, select the Raw button so that you are getting the plain-text form of the code with no HTML formatting.

- Perform a Select All on raw code, and then Copy the code. Depending on the operating system and device, Ctrl+A, Cmd+A, or an option in the Edit or context/right-click menu may perform or offer an option to select all text; and Ctrl+C, Cmd+C, or an option in the Edit or context/right-click menu should provide an option to copy.
- Often, developers will use GitHub to host code. When copying the code, select the Raw button so that you are getting the plain-text form of the code with no HTML formatting.
-
From the home page of your hub, select Apps Code in the sidebar. If you do not see Apps Code, expand the For Developers section to expose Apps Code and other developer/code links. If you do not see the For Developers section in your sidebar, navigate to Settings and enable the Show advanced/developer options preference.
-
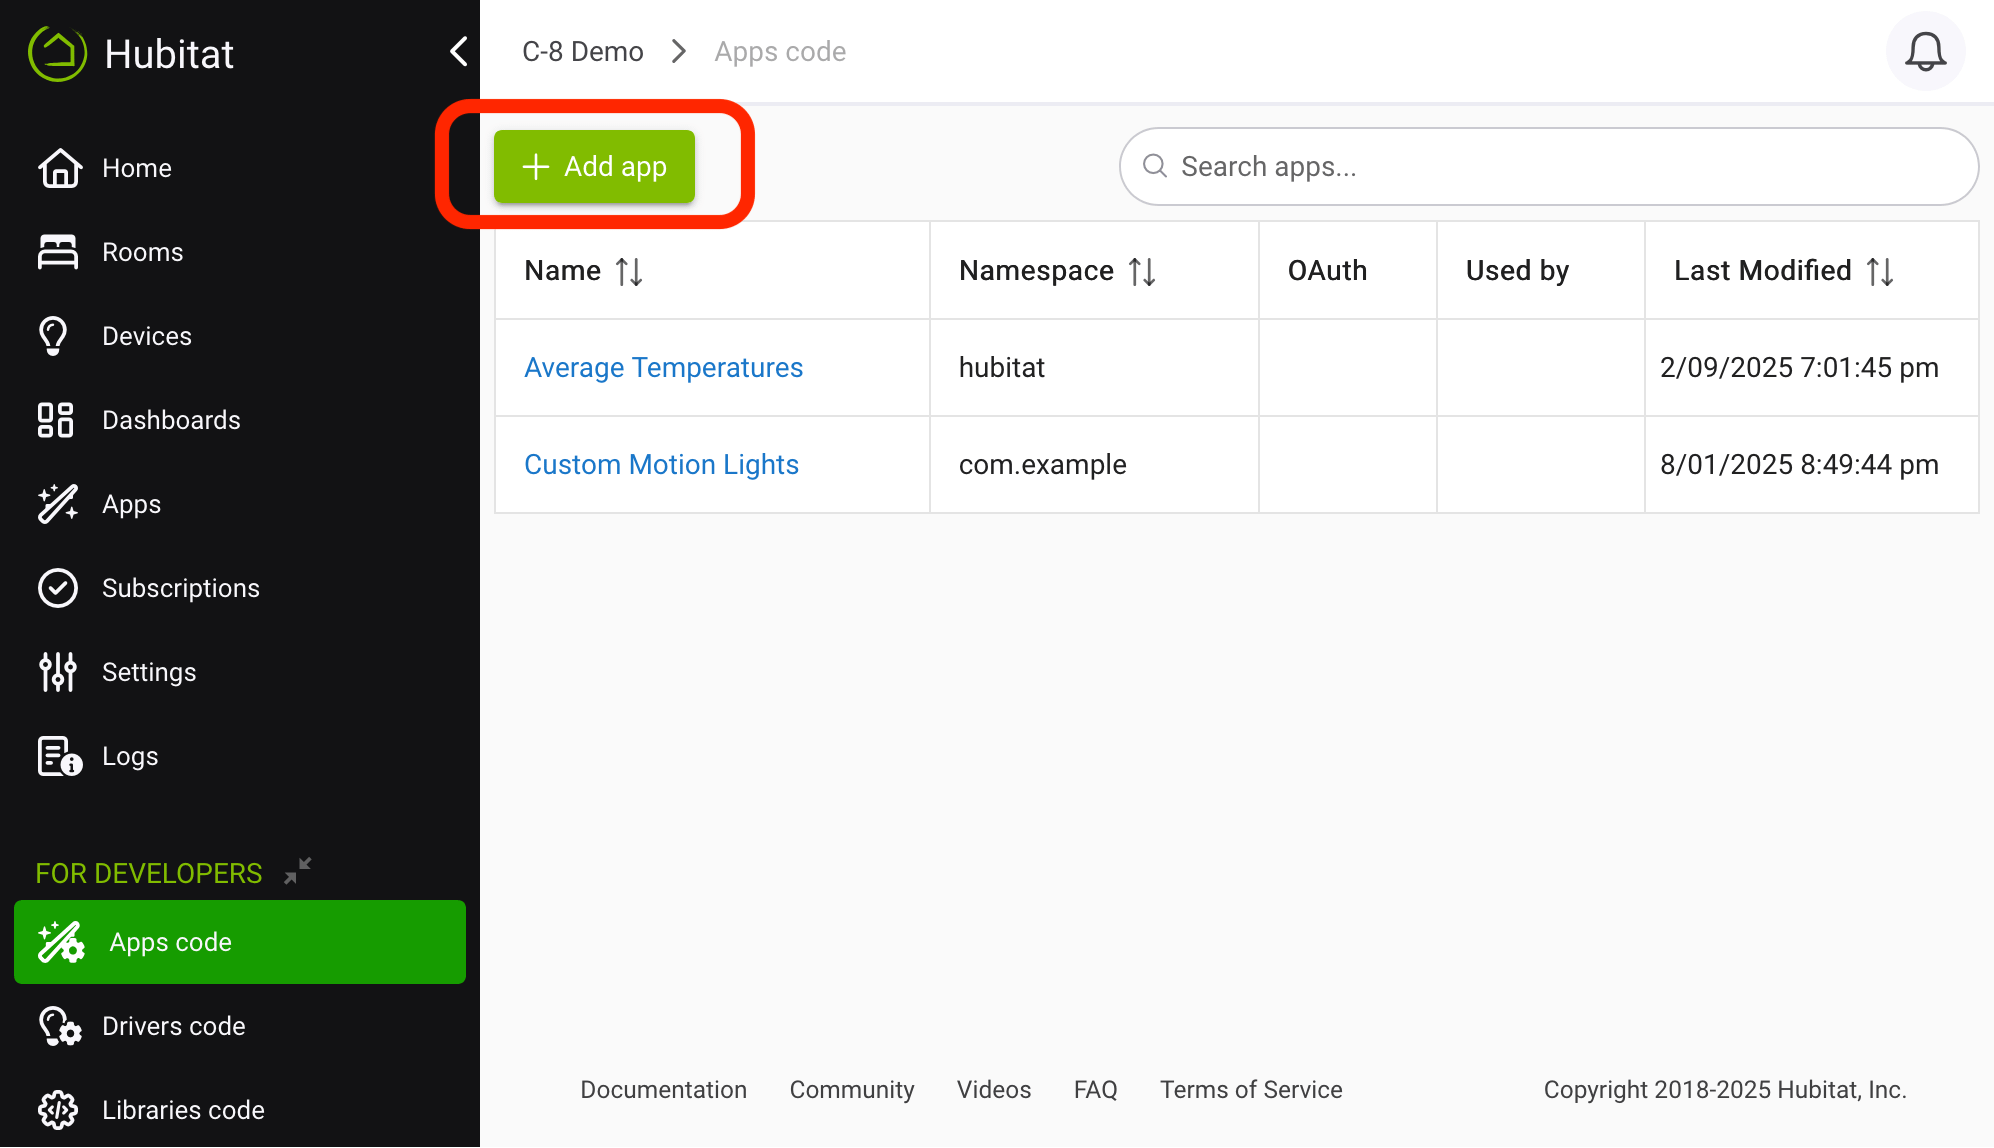
Select the Add App button in the upper right corner of the Apps Code page.
-
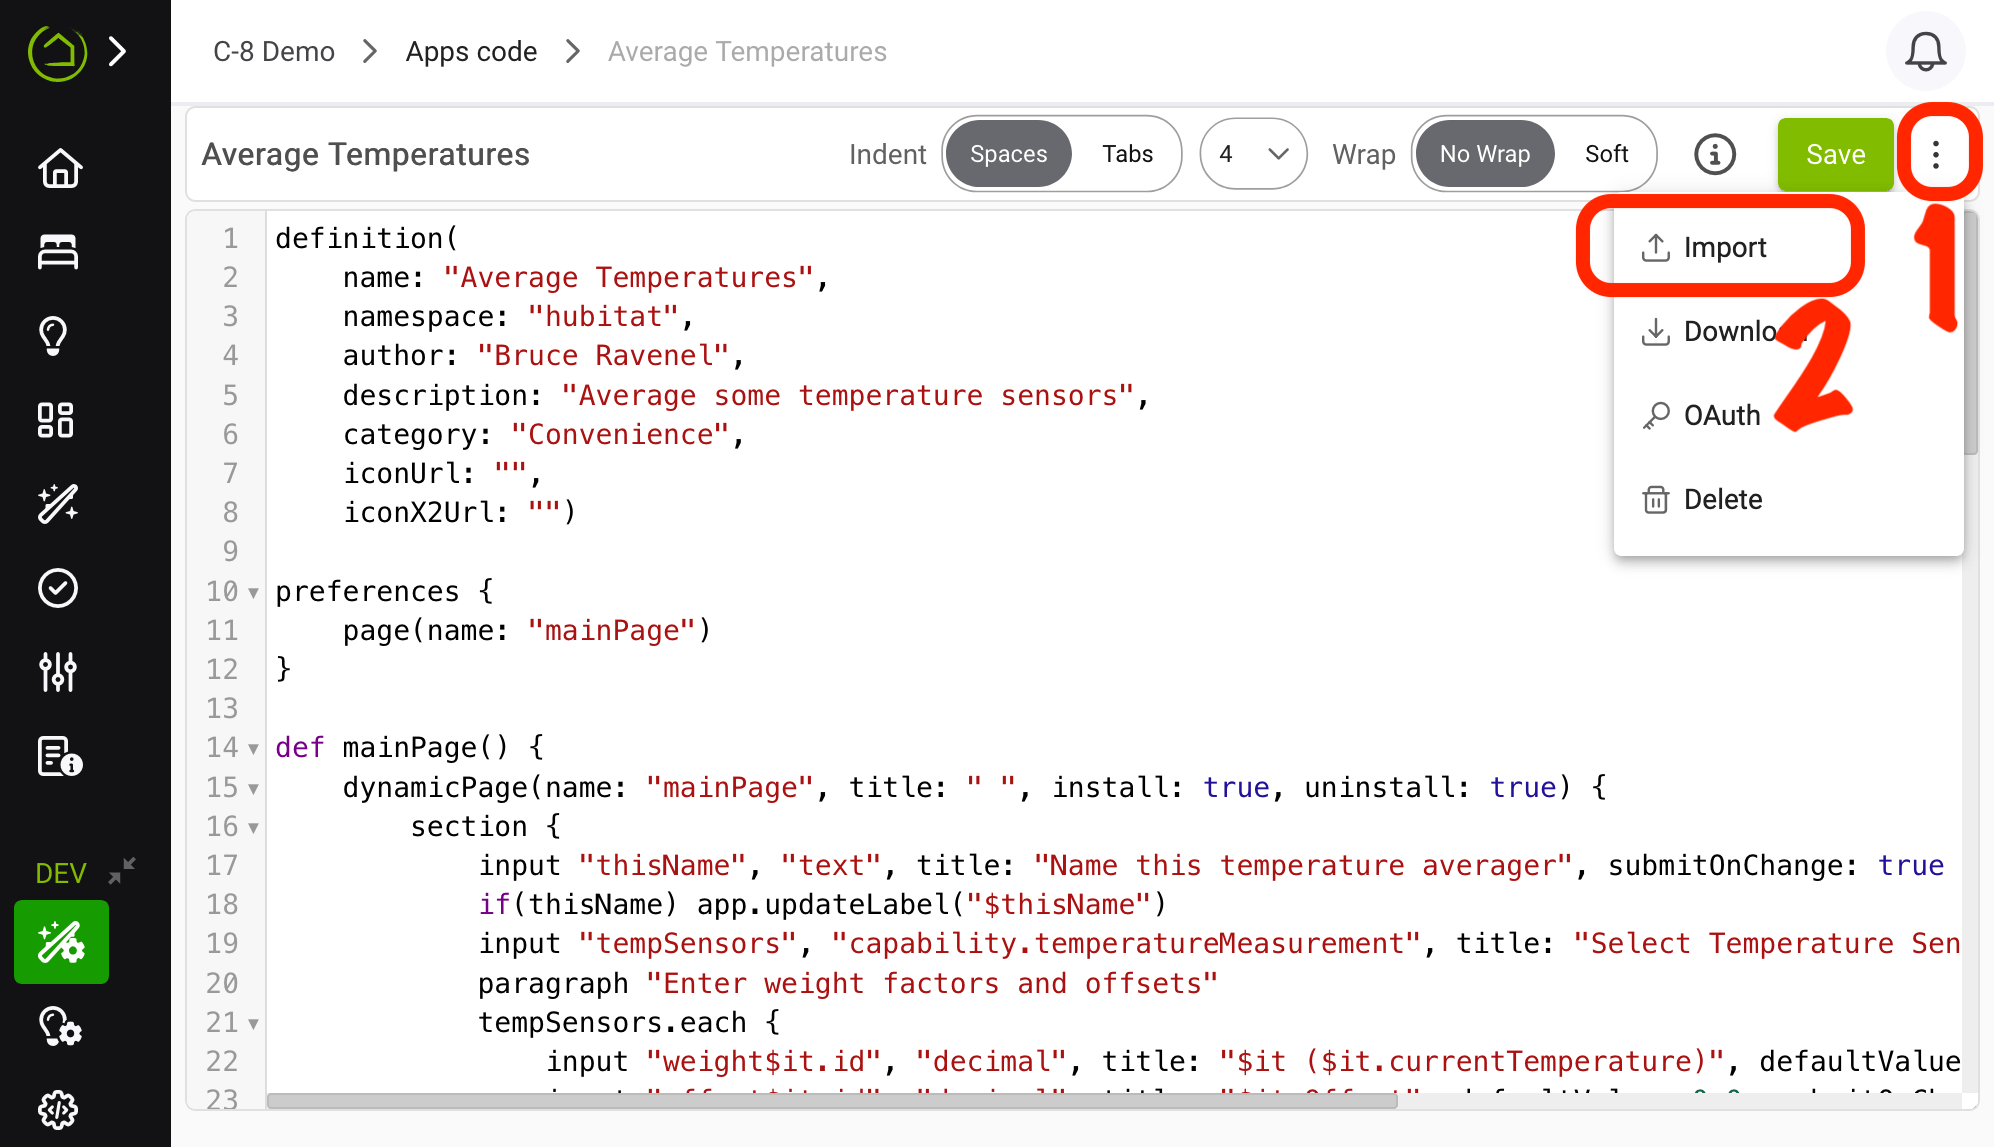
In the blank text field, paste the code (or write your own!). Alternatively, you can select the Import menu item from the three-dots menu and paste a URL to the developer's code in raw text format.
-
Select the Save button in the top right. When modified goes away (if modifying existing code) or the "New App" label is replaced with the actual app name specified in your app code, your app is saved.
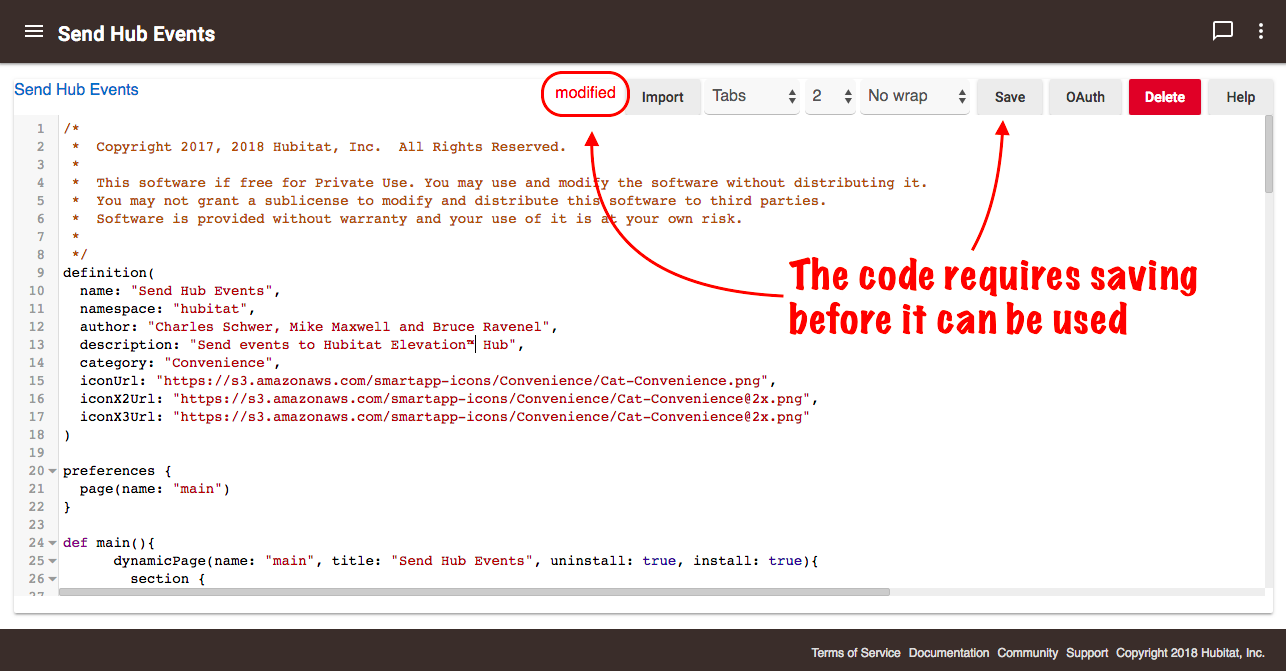
You may experience an error in this last step. If you do, your app will not save and it will not work. Please contact the developer of the app in the Hubitat Community forum (or troubleshoot the code yourself if is your own). It is usually best if you take a screen shot of the error to help them diagnose the problem. Once the code is fixed, come back and try again.
¶ Enabling OAuth
Not all user apps will require OAuth (Open Authorization). Consult the app developers documentation if using others' code. If this app does require enabling OAuth, follow the steps below.
-
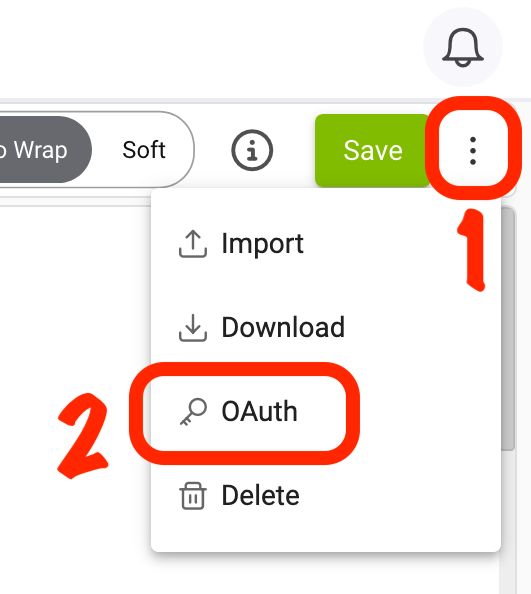
After saving your user app code, select the OAuth menu item from the three-dots menu:
-
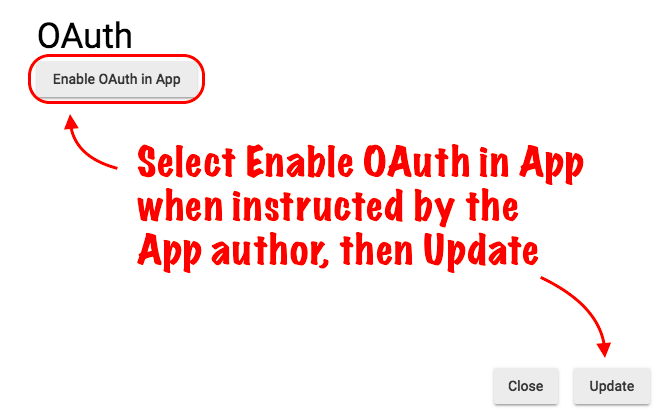
On the dialog that appears, select Enable OAuth In App, then select Update to automatically generate the keys.
-
If your client secret key becomes compromised, you may refresh it to protect the OAuth endpoint security. To refresh the client secret, open your user app code, select OAuth and check the box for Refresh Client Secret, then select Update:
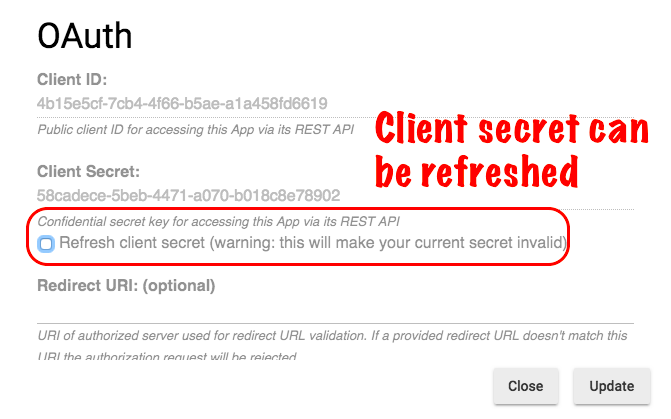
If integrating with a third-party system, you may need to update the keys/URL in that system after doing this (consult documentation for that system if needed). Bookmarks/favorites that may link to OAuth URLs from this app may also need to be updated. The specific effects will depend on your particular app, and the developer may have provided additional guidance on the use of this feature.
¶ Installing Your User Developed App
The above steps only add app code to your hub. To use the app, you will need to install an instance of the app to actually use it. To do this:
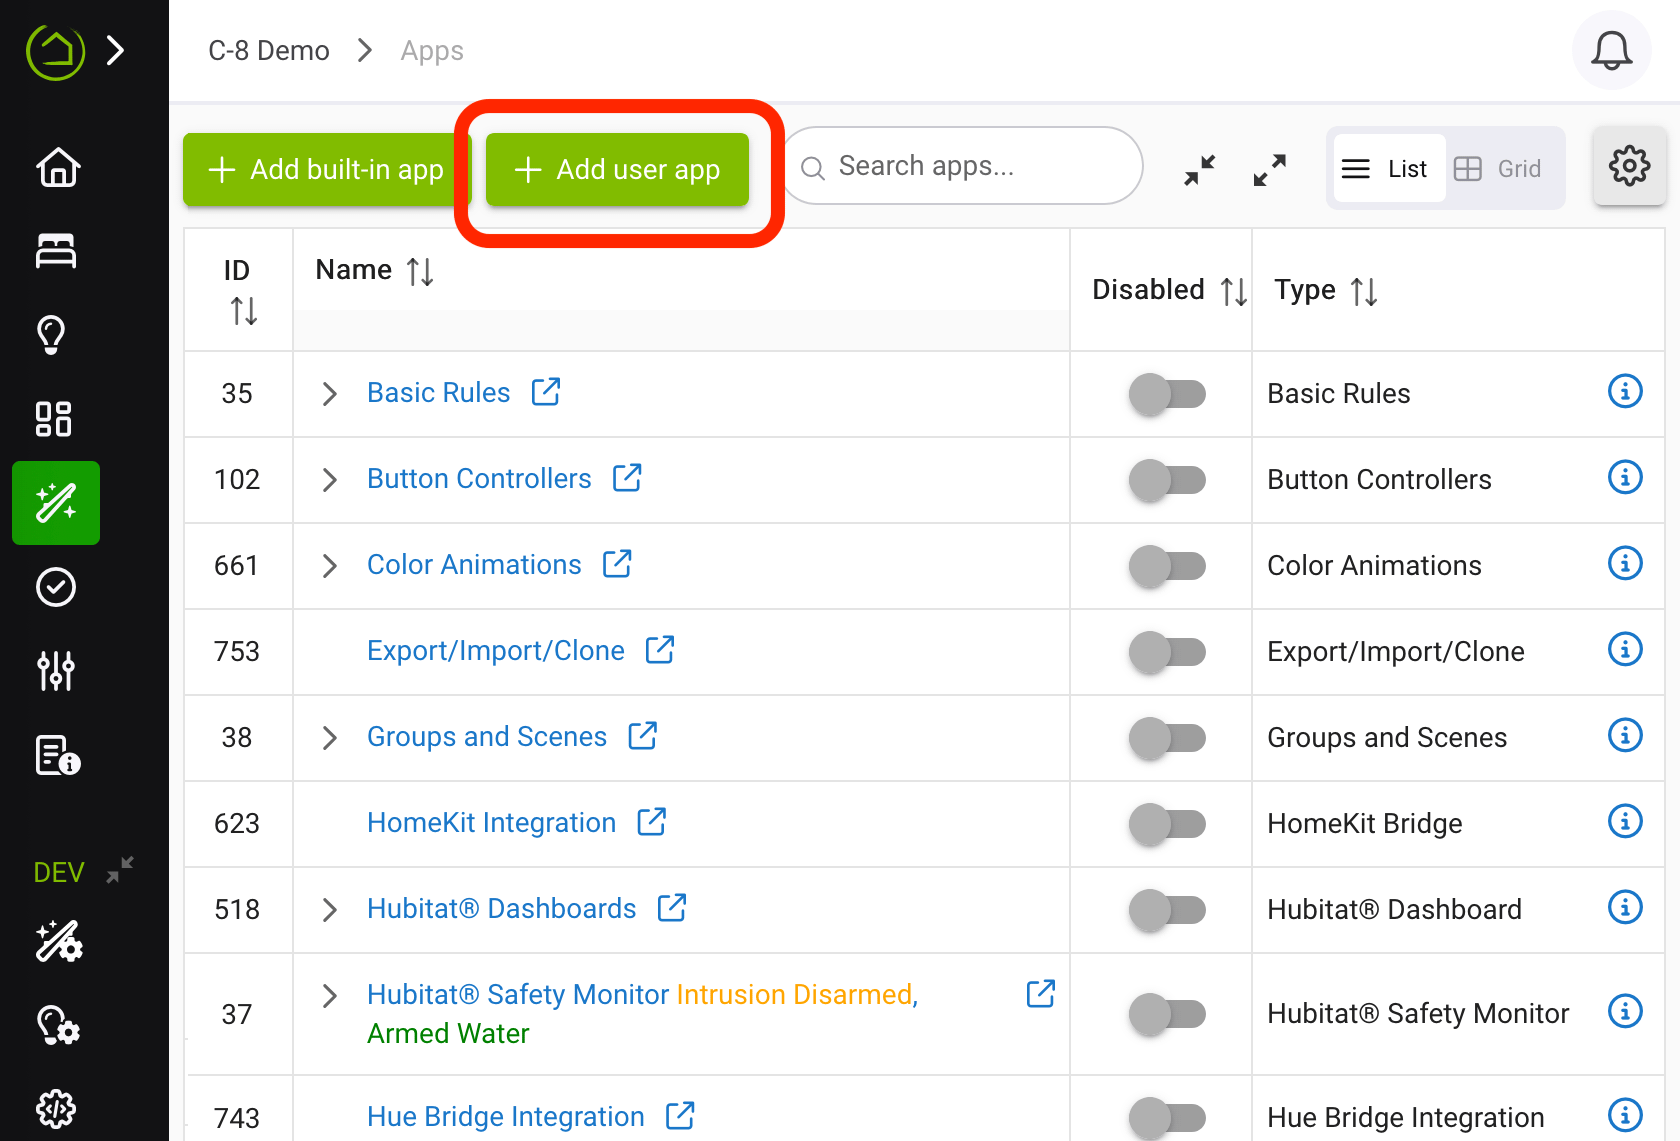
- Select Apps from the sidebar.
- Select the +Add User App button.
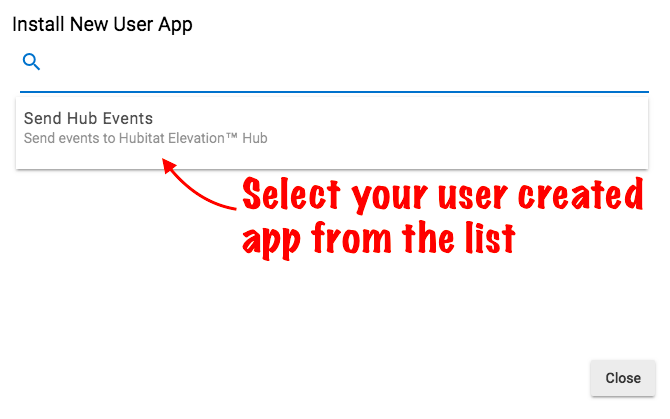
- Select your custom app from the list.
That's it! You're all set to use your new app. (Don't forget to thank the developer in the community forum for their hard work if using others' code!)