¶ Thermostat Schedulers
Users upgrading to platform 2.3.3 or later from earlier versions who had Thermostat Scheduler installed previously will find the "original" Thermostat Scheduler app installed. This document refers to the current version.
The existing app will continue to work, and there is no reason to upgrade. If desired, however, your setup may be re-created in the new app and the the old app removed (or disabled). The new Thermostat Schedulers app features a parent/child structure capable of defining one or more Thermostat Scheduler 2.0 child apps for one or more thermostat(s) and a streamlined table-based interface for setup.
The Thermostat Schedulers app allows to to create a Thermostat Scheduler to establish schedules to control the heating and cooling setpoints of a selected thermostat. You can also manually control the setpoint, EcoMode, and hold setting of a selected thermostat.
IMPORTANT: Thermostat Scheduler is intended for use with thermostats that either do not have schedules, or have their schedules disabled. For a thermostat with its own schedules, there would potentially be a conflict between the thermostat schedules and those established in Thermostat Scheduler.
¶ Installing Thermostat Scheduler
-
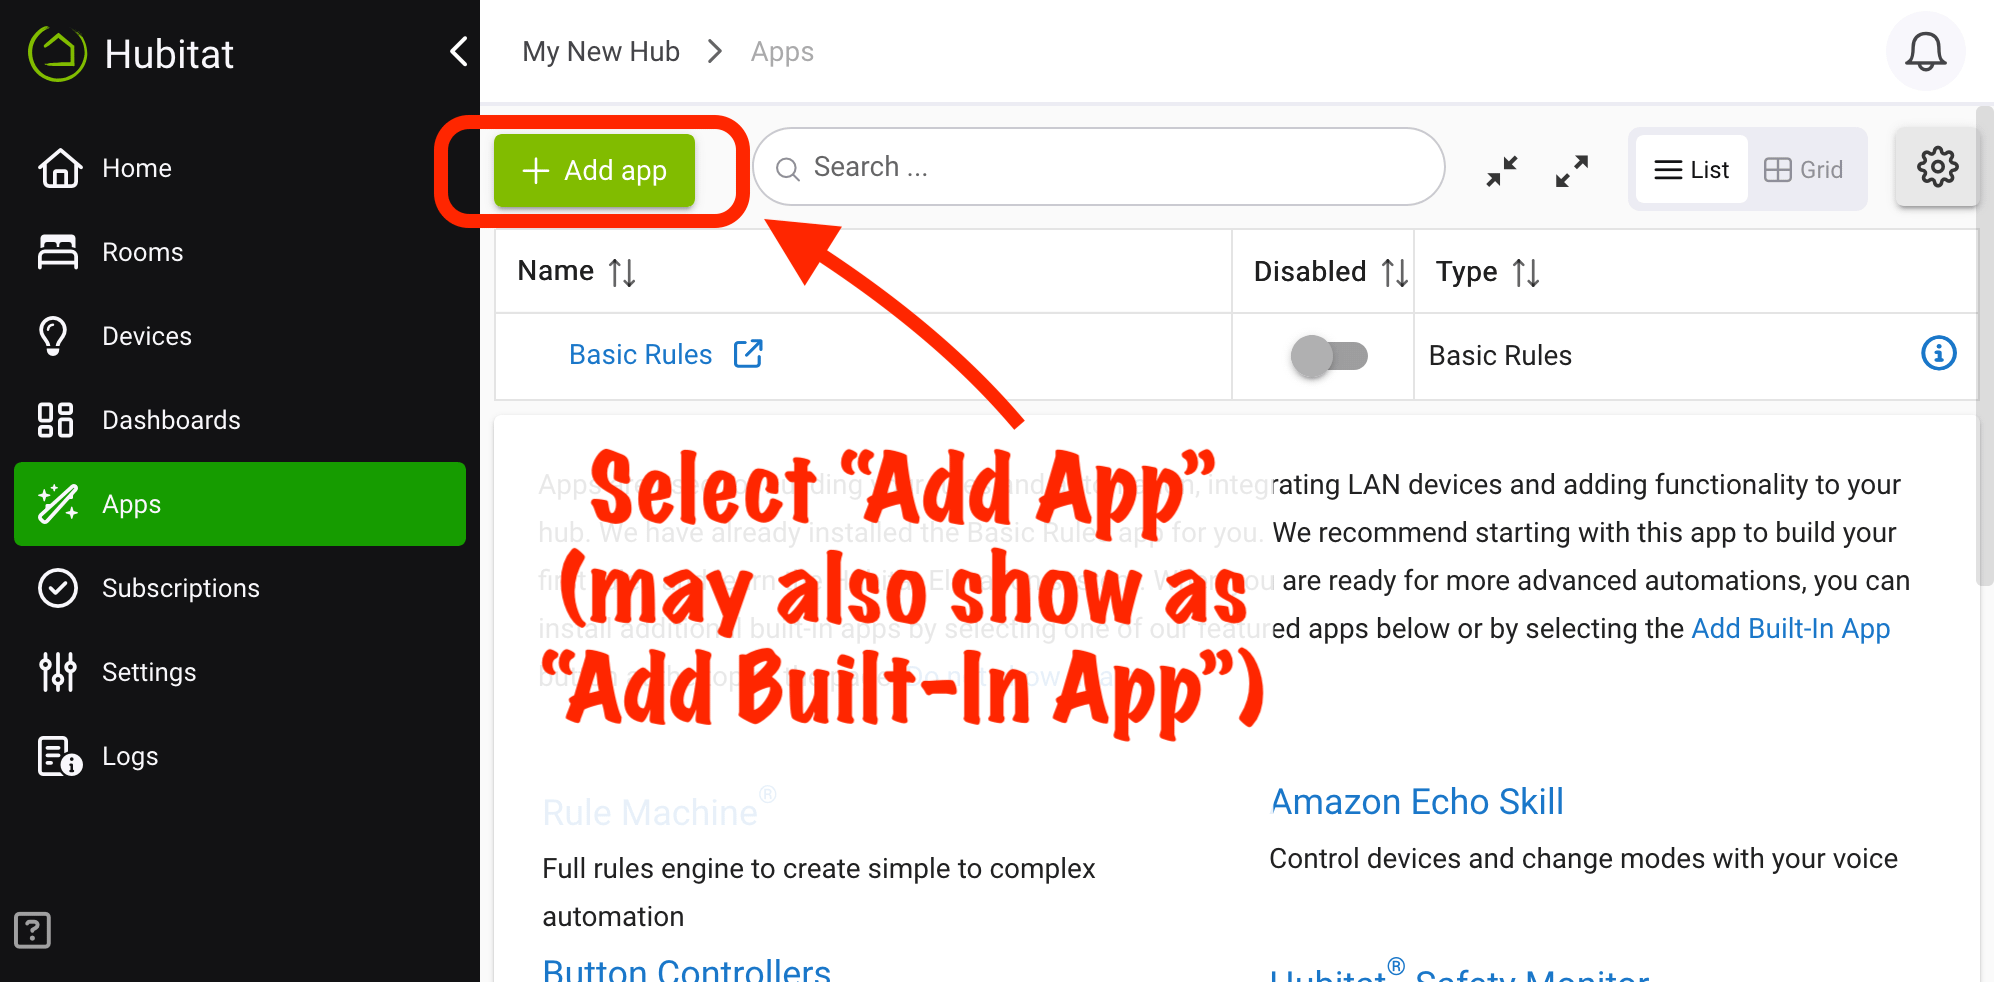
From the sidebar of your hub, select Apps and select Add Built-In App.
-
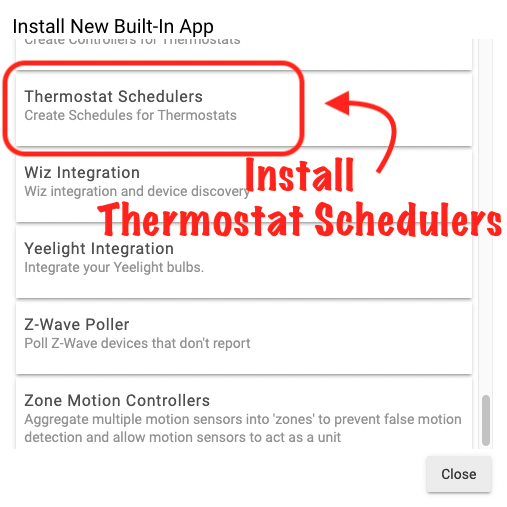
Choose Thermostat Schedulers from the list of Hubitat Elevation Built-In Apps.
-
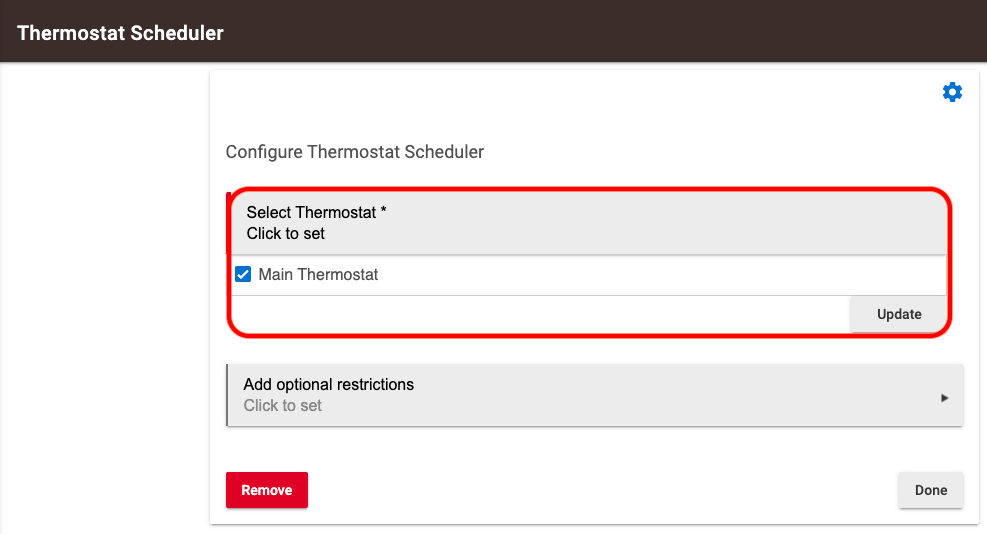
Select the thermostat for scheduling.
¶ Set thermostat scheduling and options
You may establish a schedule for a selected thermostat by either by hub modes or time periods. Under the Schedule Using dropdown, select either Hub Modes or Time Periods.
NOTE: It is not possible to mix the two types of schedules. Both types allow the option of EcoMode adjustments when the mode is Away, but only one type (either time-based or mode-based scheduling) may be in effect at a time.
¶ Schedule using time periods
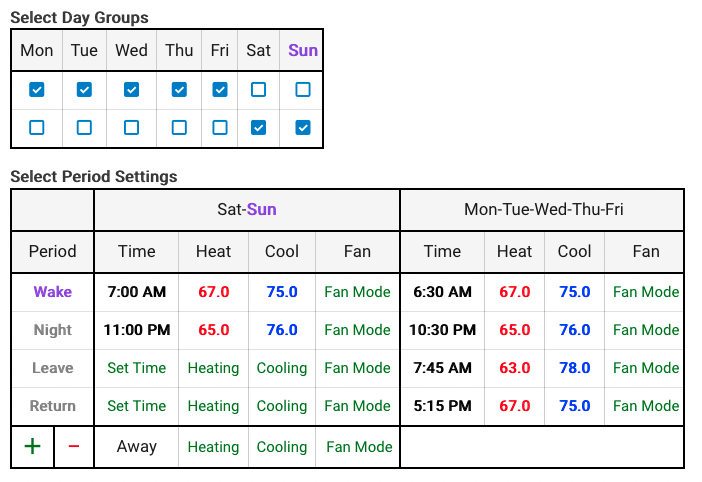
To schedule using time periods, select Time Periods under the Schedule Using dropdown. Then, configure your desired options in the Select Day Groups and Select Period Settings tables, as described below.
To use the same schedule on all days of the week, leave all days selected in the Select Day Groups table. To create different schedules for different days, uncheck the day, and it will be moved to a new row (group) in the table. You can uncheck more days to create more groups or move the checkmark for any day to another row to move it to that group. (All days must belong to at least one group, and the table will enforce this by creating or removing groups as needed.)
The Select Period Settings table allows you to configure these groups according to your specified settings.
There are four predefined periods: Wake, Leave, Return, and Night, shown in the Select Period Settings table. You can remove and add schedule periods with any name using the "+" and "-" icons below the table. For each schedule period, you can define the star time, heating setpoint to set, cooling setpoint to set, and fan mode to set. All settings are optional. Additionally, the last row of the table allows you to configure settings to use when the hub mode is Away, while still using time-based scheduling when not away. This is also optional. Click/tap the "Away Settings" text to switch between setting Away mode settings with a specific setpoint as you do for time periods and "Use EcoMode for Away," which uses EcoMode offsets when away instead.
Here is one possible configuration using time-based scheduling:
¶ Schedule using hub modes
Heating and cooling setpoints may be defined for each of your hub modes. A schedule for mode changes could be established in Mode Manager or another app. Mode Manager allows day-of-week—specific scheduling if desired, along with presence-based mode setting and other options.
To schedule using modes, select Hub Modes from the Schedule Using dropdown. Then, configure your desired settings in the Control Thermostat with Modes table. By default, all modes will be offered in the table. You can add and remove modes from the table using the "+" and "-" icons below the table. Not all modes need settings defined; any change to a mode without settings defined will leave the thermostat as-is. A mode named "Away" allows for a special case where you can either specify settings for the mode like other modes (the default) or use EcoMode offsets for away mode. To enable this setting, click or tap "Away" in the "Mode" column in this table. The text will change to "Away (EcoMode)" when the EcoMode offset option is enabled.
¶ EcoMode Offset
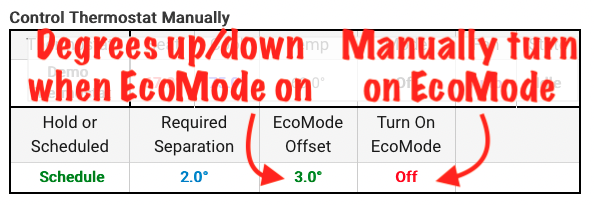
EcoMode provides a selectable number of degrees by which to adjust the setpoints when the mode becomes Away or changes from Away to some other mode. When the mode becomes Away, the heating setpoint is reduced by the selected offset and the cooling setpoint is increased by the selected offset. Upon the mode changing from Away, the setpoints are returned to their prior settings.
The EcoMode offset can be changed under the EcoMode Offset column in the Control Thermostat Manually table. EcoMode can be manually turned on or off using the On or Off link in the Turn On EcoMode or Turn Off EcoMode column. If the Turn On EcoMode column says Off, EcoMode is currently off, and selecting Off will turn EcoMode on, and vice versa.
¶ Setpoint Separation
If you are using Auto mode, enter the Required Setpoint Separation in the Control Thermostat Manually table. This will prevent repetitive cycling between cooling and heating when their respective setpoints have been reached but slightly exceeded.
¶ Control Thermostat Manually
Use the options in the Control Thermostat Manually table to change the heating or cooling setpoint, thermostat mode, or fan mode of your selected thermostat. You can also switch between hold or scheduled mode, remove or edit the required setpoint separation, change the EcoMode offset, or turn on or off EcoMode. Click or tap in the appropriate table cell to change the setting.

¶ Optional Restrictions
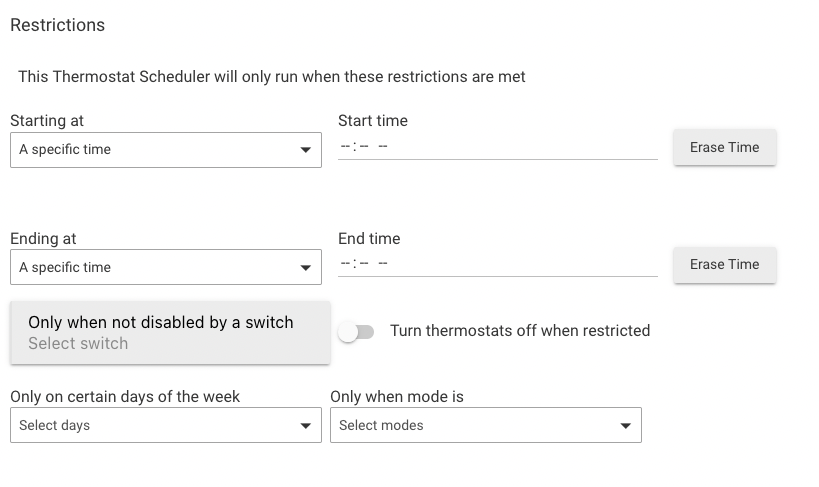
You may establish restricted time periods, days of the week, or specific modes when your thermostat can adjusted by your specified schedule. You can also disable scheduling with a switch, or set the thermostat itself to "off" when the Thermostat Scheduler app restrictions are in effect.
These options are available inside the Add optional restrictions page.
