¶ File Manager
File Manager allows you to store files locally on your hub. These files can be uploaded and managed from Settings > File Manager or from Rule Machine.
¶ File Names
File names can contain only letters (A-Z and a-z), numbers (0-9), hyphens (-), and underscores (_). Periods (.) are allowed as any character except the first character of the file name. Spaces are not allowed, nor are any other characters.
¶ How to Use
Rule Machine offers actions to directly write, append, or delete File Manager files. These actions are found under Set Variable, Mode or File, Run Custom Action. Rule Machine also offers the ability to read File Manager files. One way is by setting a local (or hub) variable of type String to the contents of the file using Set Variable, Mode or File, Run Custom Action > Set Variable and selecting Set from local file under Select string operation. Alternatively, file contents can be read or set in rules anywhere that %variable-name% can be used by using the format %/local/file-name% instead, where file-name is the name of an existing file. This works in any context where a variable of type String would be accepted.
¶ Access via HTTP
Local files can also be accessed on the LAN at <your-hub-IP>/local/<fileName>. For example: http://192.168.1.5/local/myFile.txt.
¶ Manually Uploading and Managing Files
As mentioned above, files can be manually managed from Settings > File Manager. To do this:
-
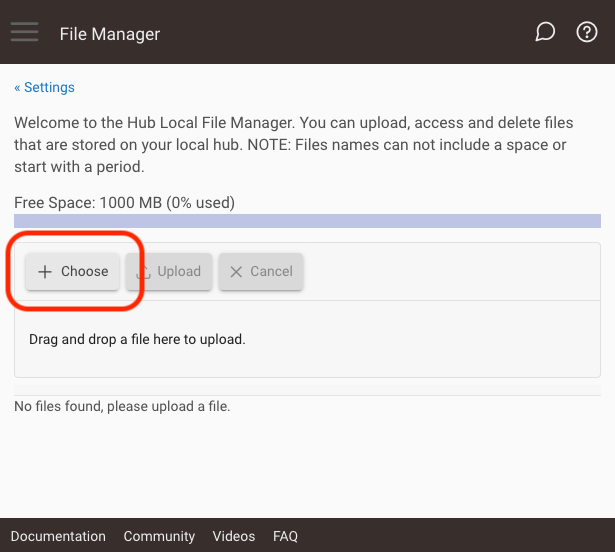
First, select the Choose button:
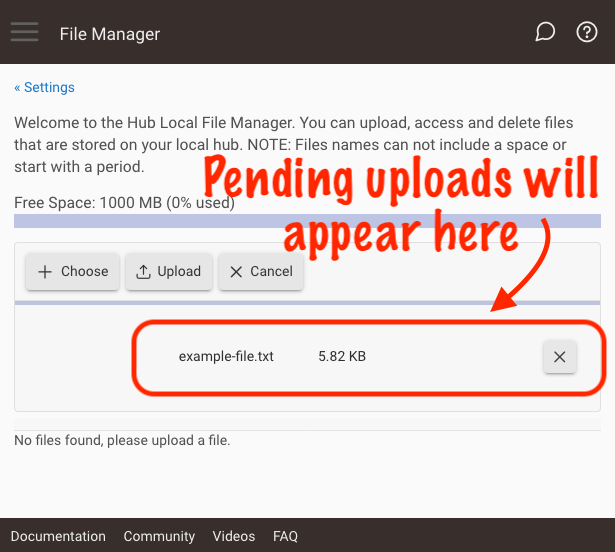
Then, select the file you want to upload (selecting Choose in the previous step should make your browser or operating system's standard file chooser dialog appear). -
Optionally, repeat step 1 to add multiple files to the list of files to upload. Pending uploads will appear in a list below the Choose, Upload, and Cancel buttons.
-
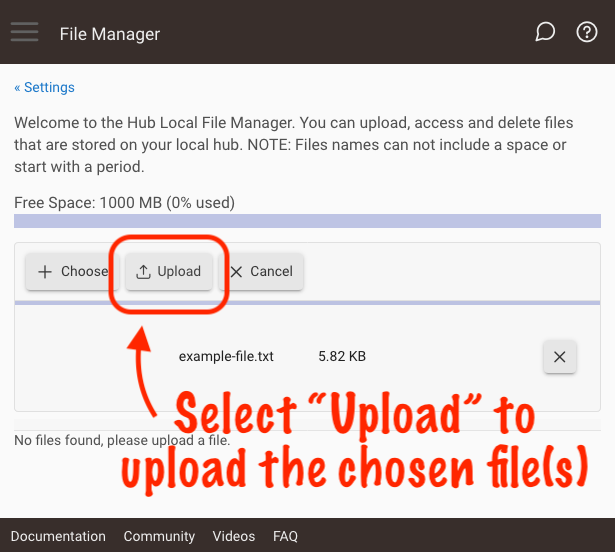
Finally, select the Upload button again to upload the file(s), and wait until the upload is complete (a small progress bar will appear while uploading but may disappear before it is visible if the files are very small):
-
When the upload is complete, you will see the text Successfully uploaded <your file name> displayed (A), and you will also see the file in the list (B):
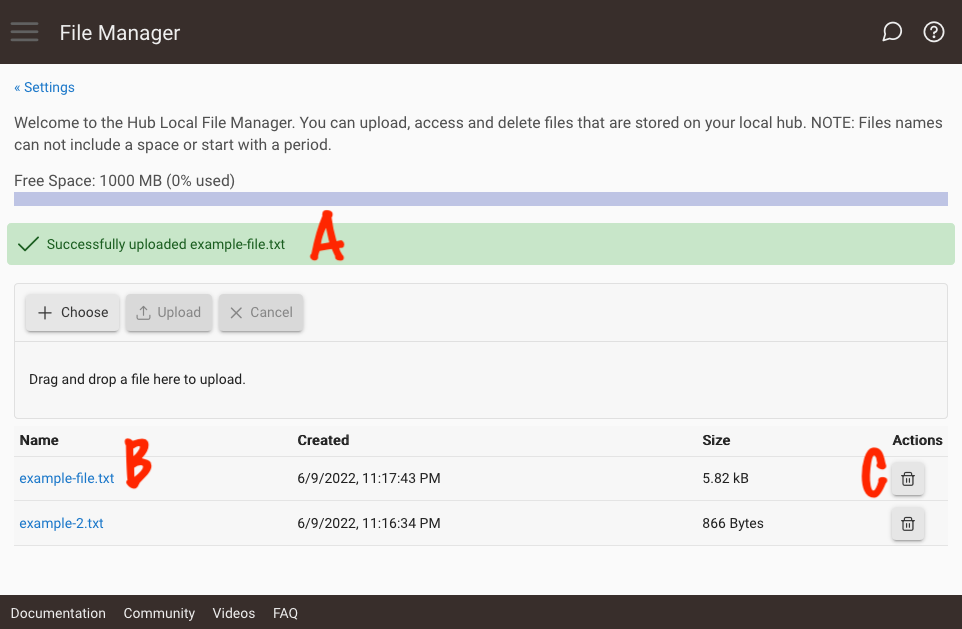
A file can be deleted using by selecting the delete icon, C.
¶ Developer API
Developers writing custom Groovy apps or drivers on the platform can consult the File Manager API document for reference.