¶ How to Install Custom Drivers
Hubitat Elevation continues to add to its list of built-in drivers. However, the creative Hubitat community continues to create drivers for devices we haven't integrated yet or that contain specialized feature sets compared to built-in drivers. To use a custom driver, you will first need to add the code to your hub.
Not that Hubitat cannot offer support for third-party drivers; however, the third-party developer may.
¶ Installing custom drivers
To add driver code to your hub, you must first have the source code (or "code") for the driver. The developer of the driver will normally post a link to their driver code. Follow their directions to get to the source code. Select and copy the either the source code itself or the URL to the "raw" source code (e.g., if using GitHub, select the Raw button on the toolbar above the plain-text source code if you see this button).
-
Navigate to Settings and ensure the Show advanced/developer options toggle is enabled.
-
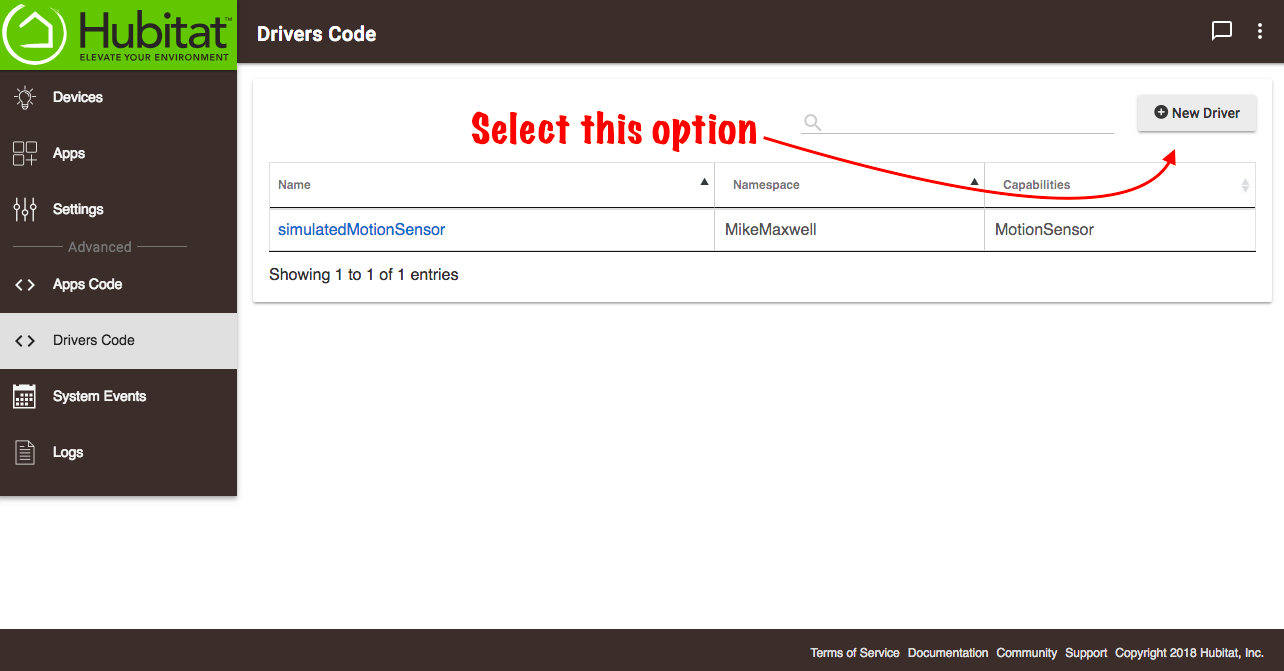
From the sidebar of your hub, select Drivers Code. (If you do not see Drivers Code, expand the For Developers section. If you do not see For Developers, return to the previous step to verify.)
-
Select the +Add Driver button in the upper left:
-
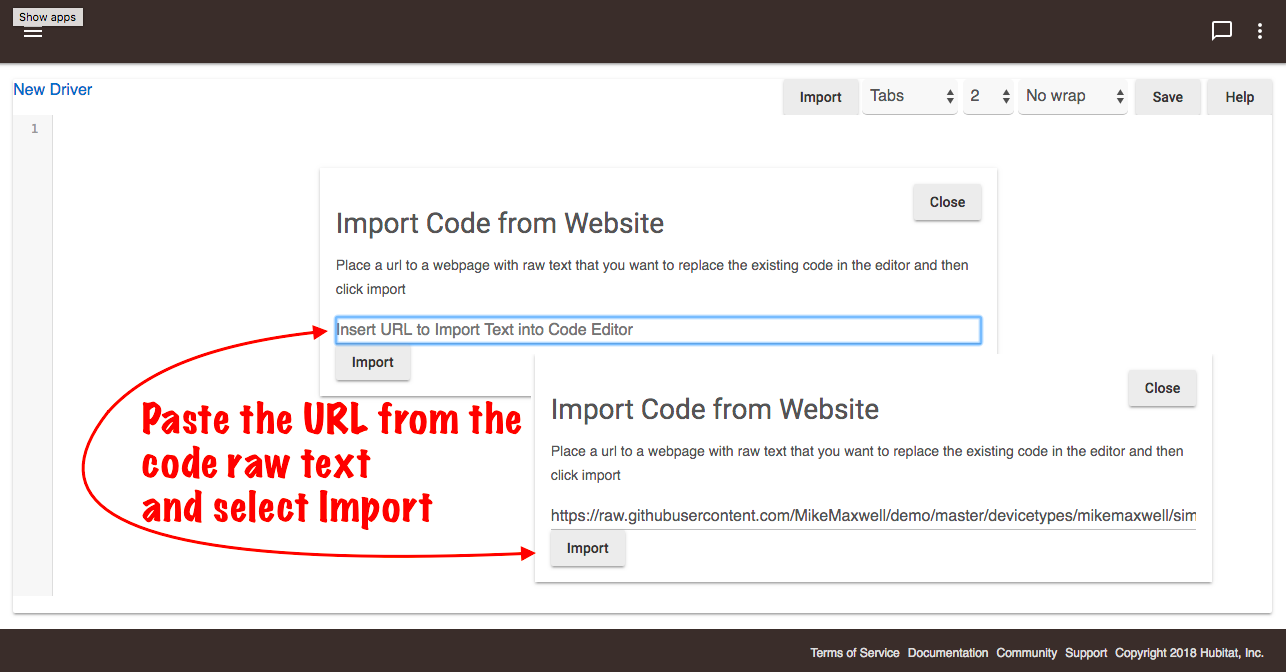
In the blank text field, simply paste the driver code. Alternatively, you can open the three-dots (...) menu, select Import, and paste a URL to the code in plain text format.
-
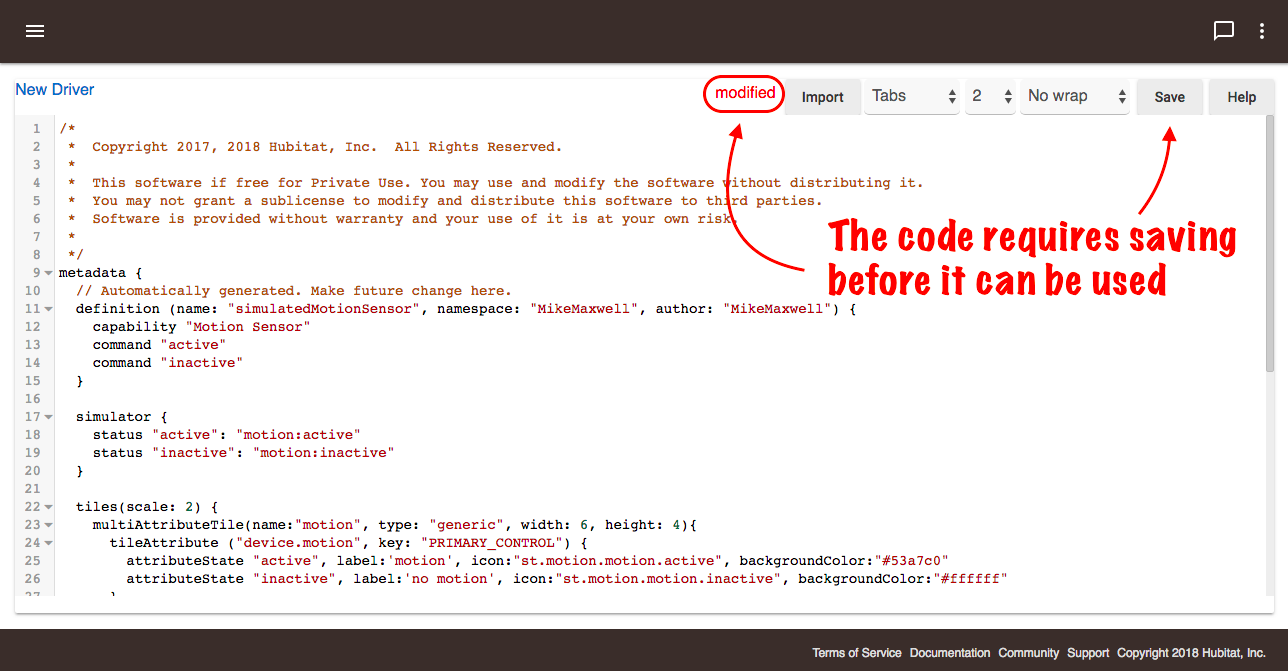
Select the Save button in the top right of the page. When the progress bar disappears or the "modified" text at the top of the page (next to the driver name, e.g., "New driver - modified") goes away, your driver is saved.
- Note: You may experience an error in this step. If you do, your driver will not save and it will not work. If the erorr message is not helpful for you, please contact the developer of the driver in the Community forum (or wherever you obtained the code). It is usually best if you take a screen shot to help them diagnose the problem. Once the code is fixed, come back and try again.
- Note: You may experience an error in this step. If you do, your driver will not save and it will not work. If the erorr message is not helpful for you, please contact the developer of the driver in the Community forum (or wherever you obtained the code). It is usually best if you take a screen shot to help them diagnose the problem. Once the code is fixed, come back and try again.
¶ Loading your custom driver
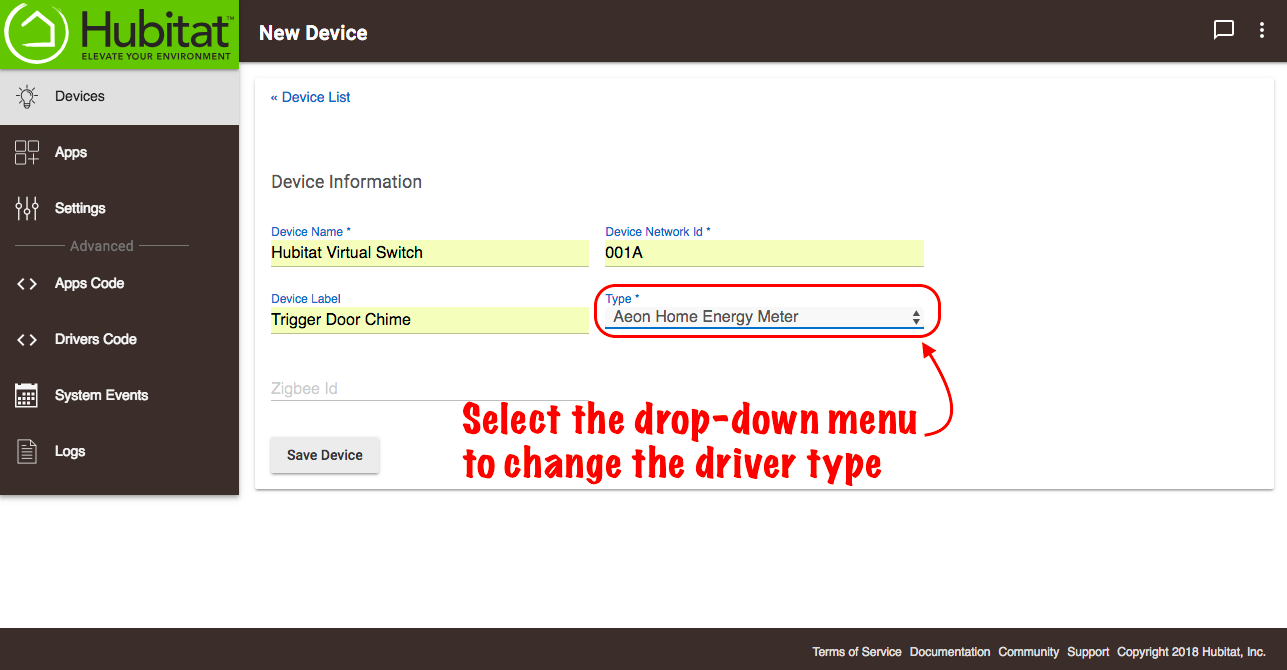
Once your driver has successfully saved, you will need to update your device(s) with the new driver. If your driver is for an existing device, navigate to its device detail page and select this driver under the Type dropdown. See How to Change the Driver Used By a Device for more information.
If your driver is for a new (yet to be added) device, it may be chosen automatically on pairing/inclusion to the hub. If not, it can be selected manually by this same process as above. If you are not sure how to use the driver, consult the developer or any documentation they may have provided.
If the driver requires you to add a new virtual device using this driver (some LAN or cloud integrations may, or they might have an app that manages this for you instead; this would not apply to Zigbee or Z-Wave devices -- these steps are necessary only if the driver requires manually adding a new virtual device), follow the steps below:
-
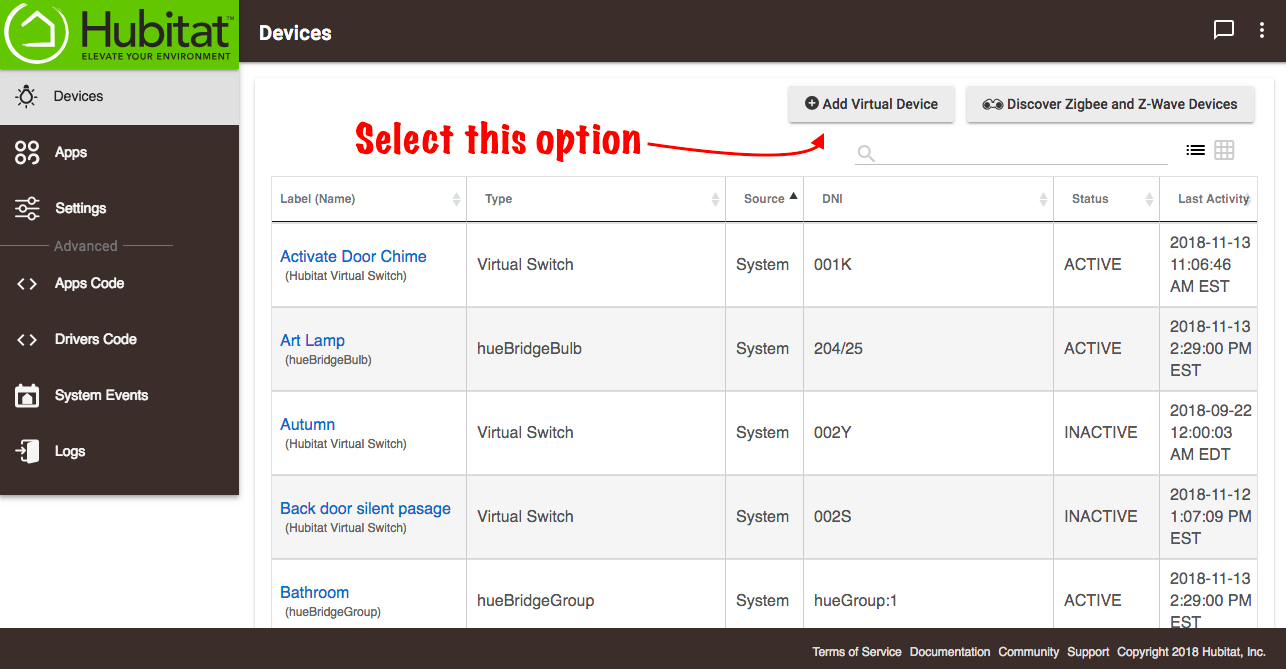
From the home page of your hub, select Devices in the side bar.
-
Select + Add Device:
-
Under Add device manually, select Virtual.
-
In the Select device type dropdown, choose your driver.
- NOTE: Custom drivers appear at the bottom of the list under the heading User.
- TIP: Use the search box to filter the list of drivers and find yours more easily.
-
Select Next to create the device.
-
Provide a name for your device under Give your new (driver name) a name. This sets the "Device Label" field for the device and will determine how it appears in apps, logs, etc., the same as when adding any new device.
-
Select Next.
-
Optionally, select a Room to which to assign the device, then select Next. Alternatively, select Skip.
-
Recommended: select View device details to navigate to the device detail page for your device and test functionality.
Your custom driver is now installed and will used by the new device.
(Don't forget to thank the developer in the community forum for their hard work!)