¶ Drivers Code
Hubitat Elevation continually adds to its list of included drivers. We recommend using these drivers whenever possible. The list of compatible devices includes the recommended driver for known compatible devices.
However, the generous Hubitat community continues to create drivers for devices we haven't integrated yet or to expose features differently (and any user can do the same with Groovy-language programming). When you find one you want to use, you will need to add the driver code to your hub, then assign that driver to a device.
¶ Installing custom drivers
- The developer of the driver will normally post a link to their driver code. Follow their directions to get to the source code.
- Often, developers will use GitHub to host code. When copying the code, select the Raw button so that you are getting the “raw” text of the code, with no HTML formatting.

- Select All the raw code, and then Copy the code.
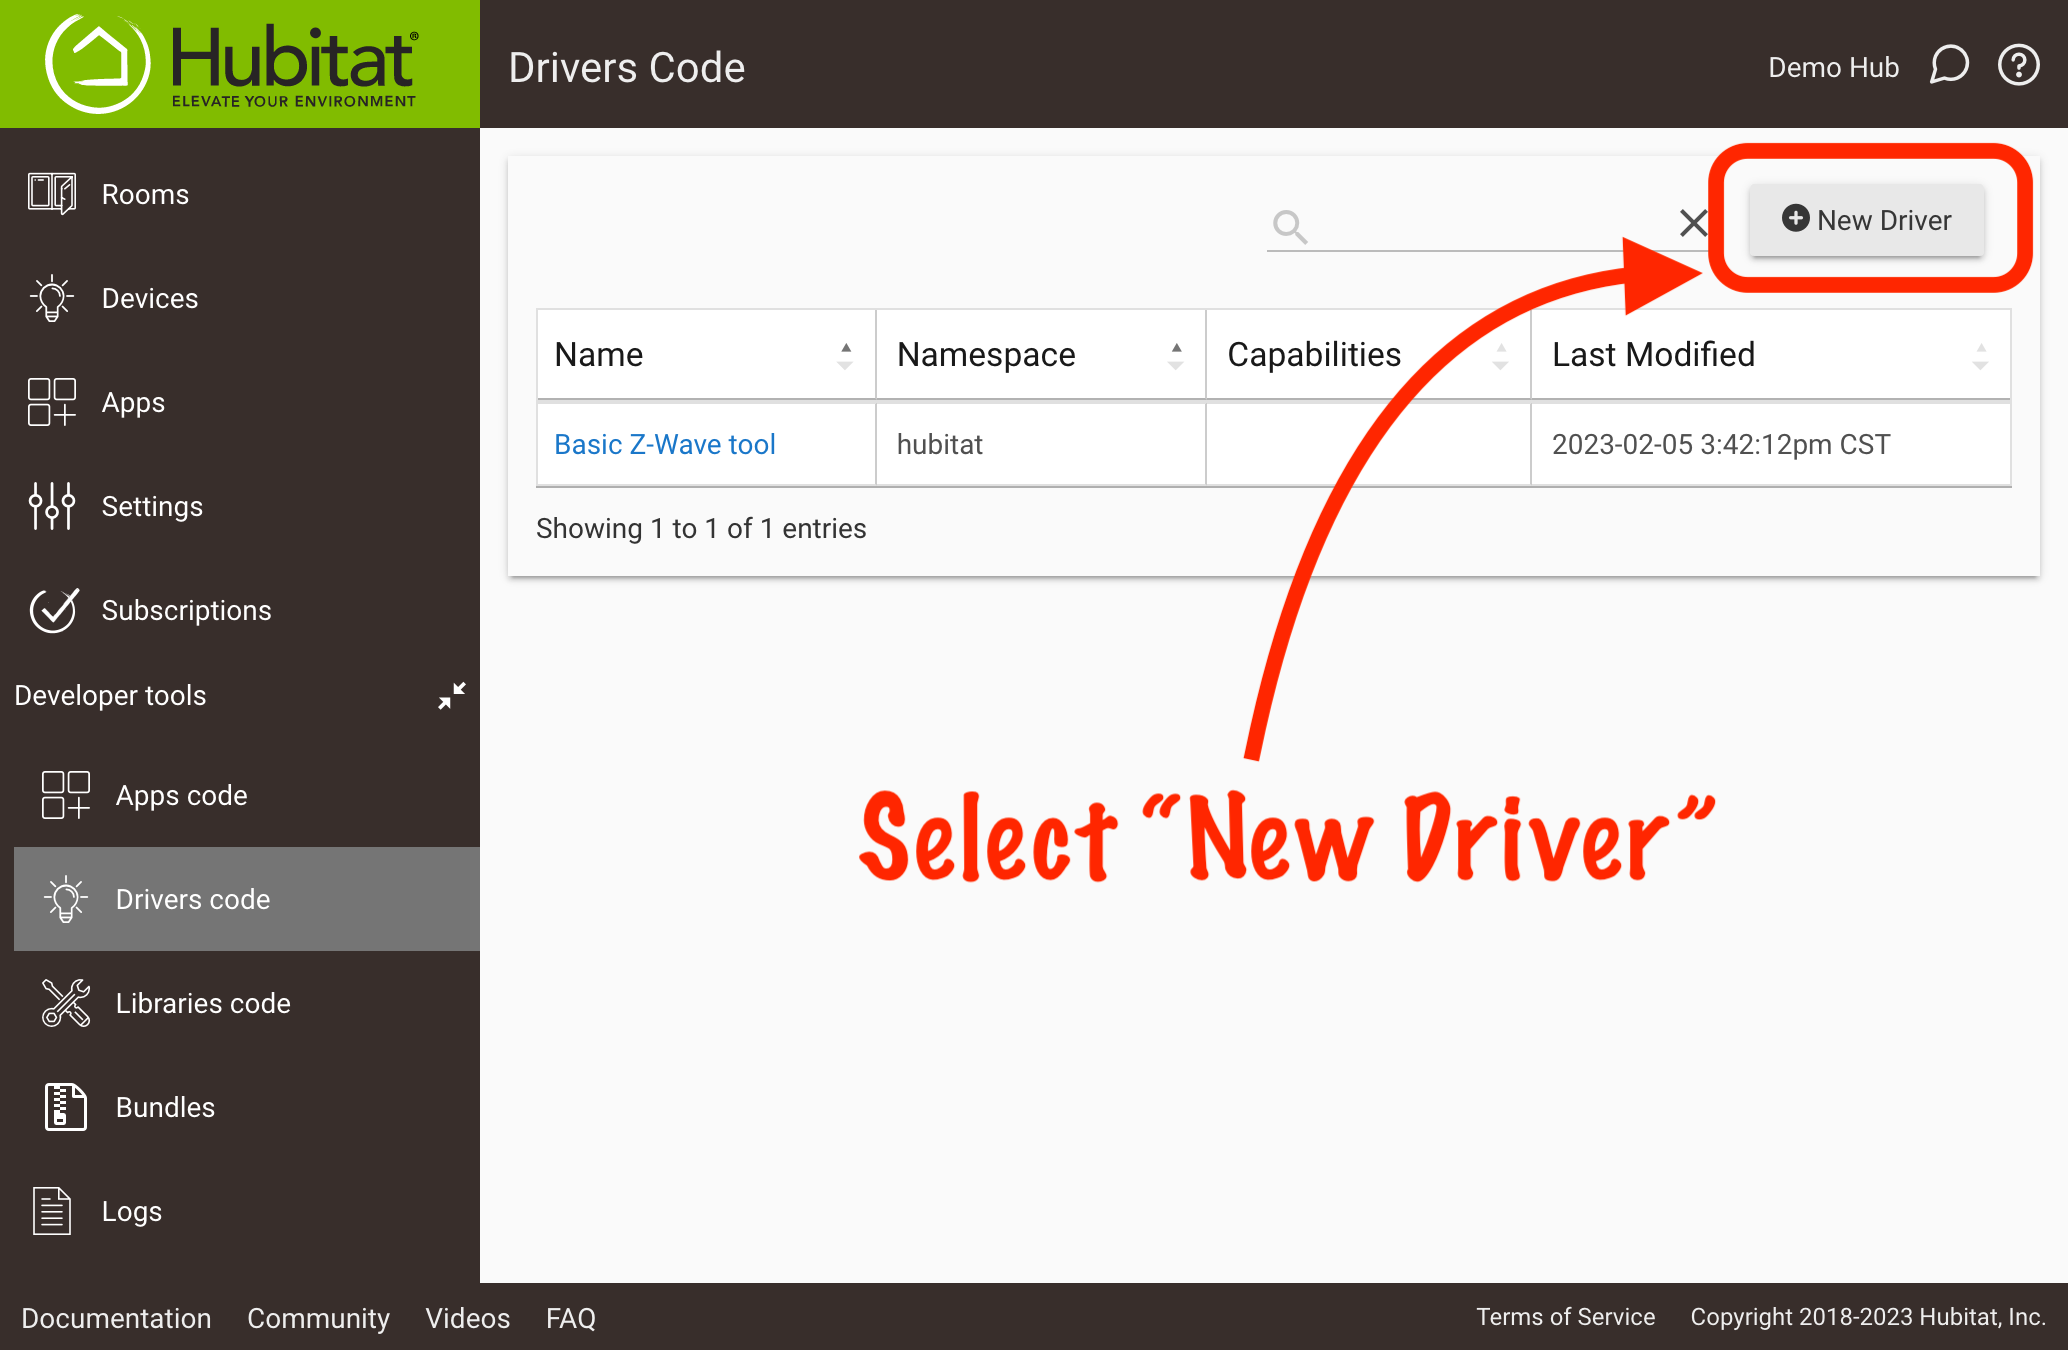
- From your Hubitat Elevation® Web Interface, select Drivers Code in the sidebar. (Expand the For Developers section if you do not see this, and enable Show advanced/developer options in Settings if you do not see this section at all.)
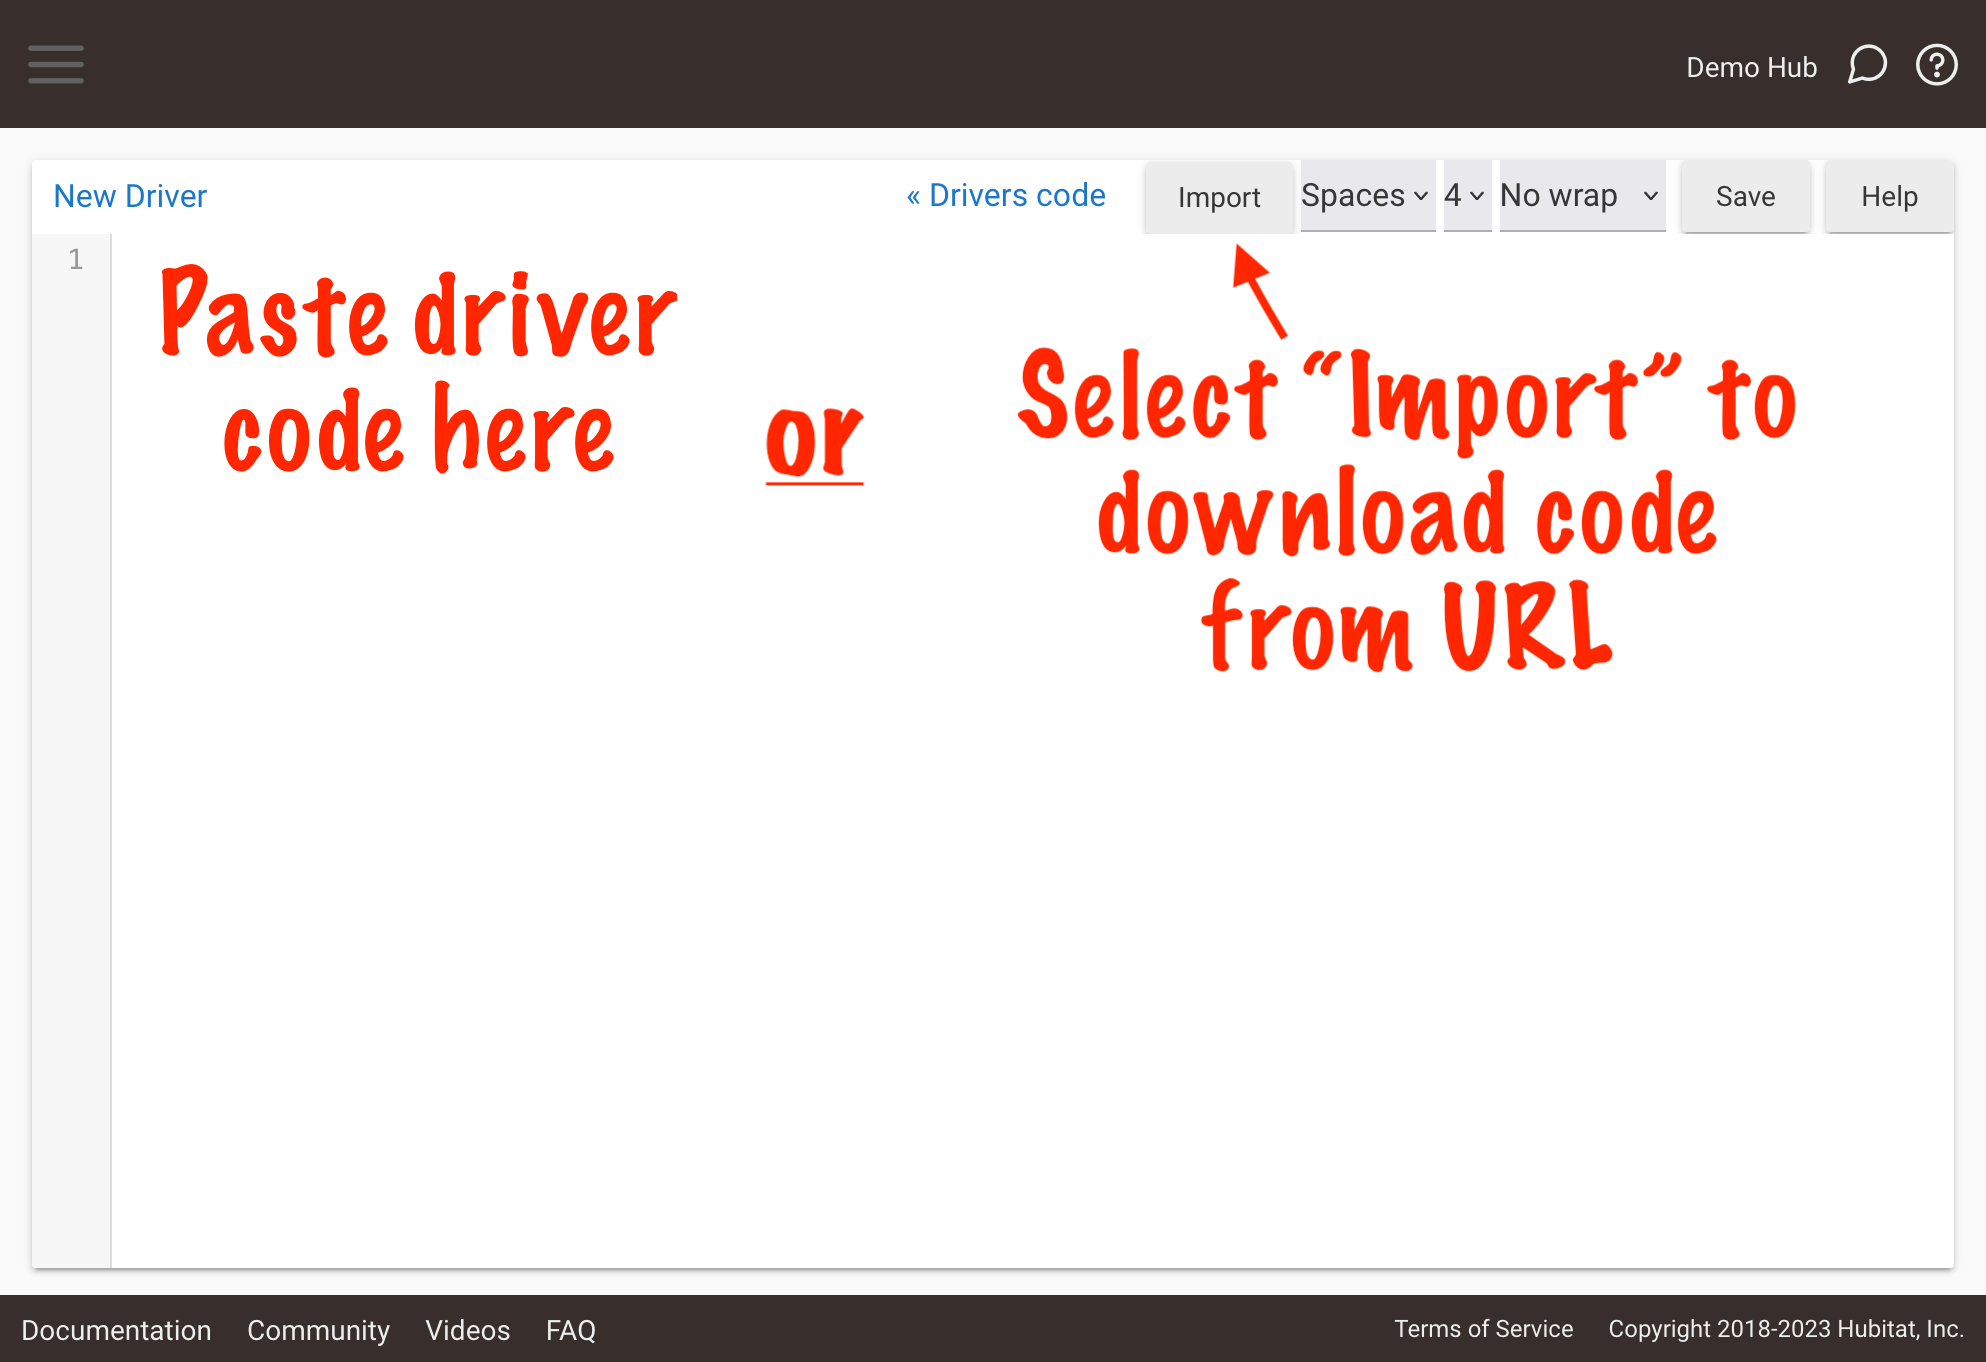
- Select the +Add Driver button in the top left.

- In the blank text field, simply paste the driver code. Alternatively, you can select the Import menu item from the three-dots menu and past a URL to the developer's code in raw text format.

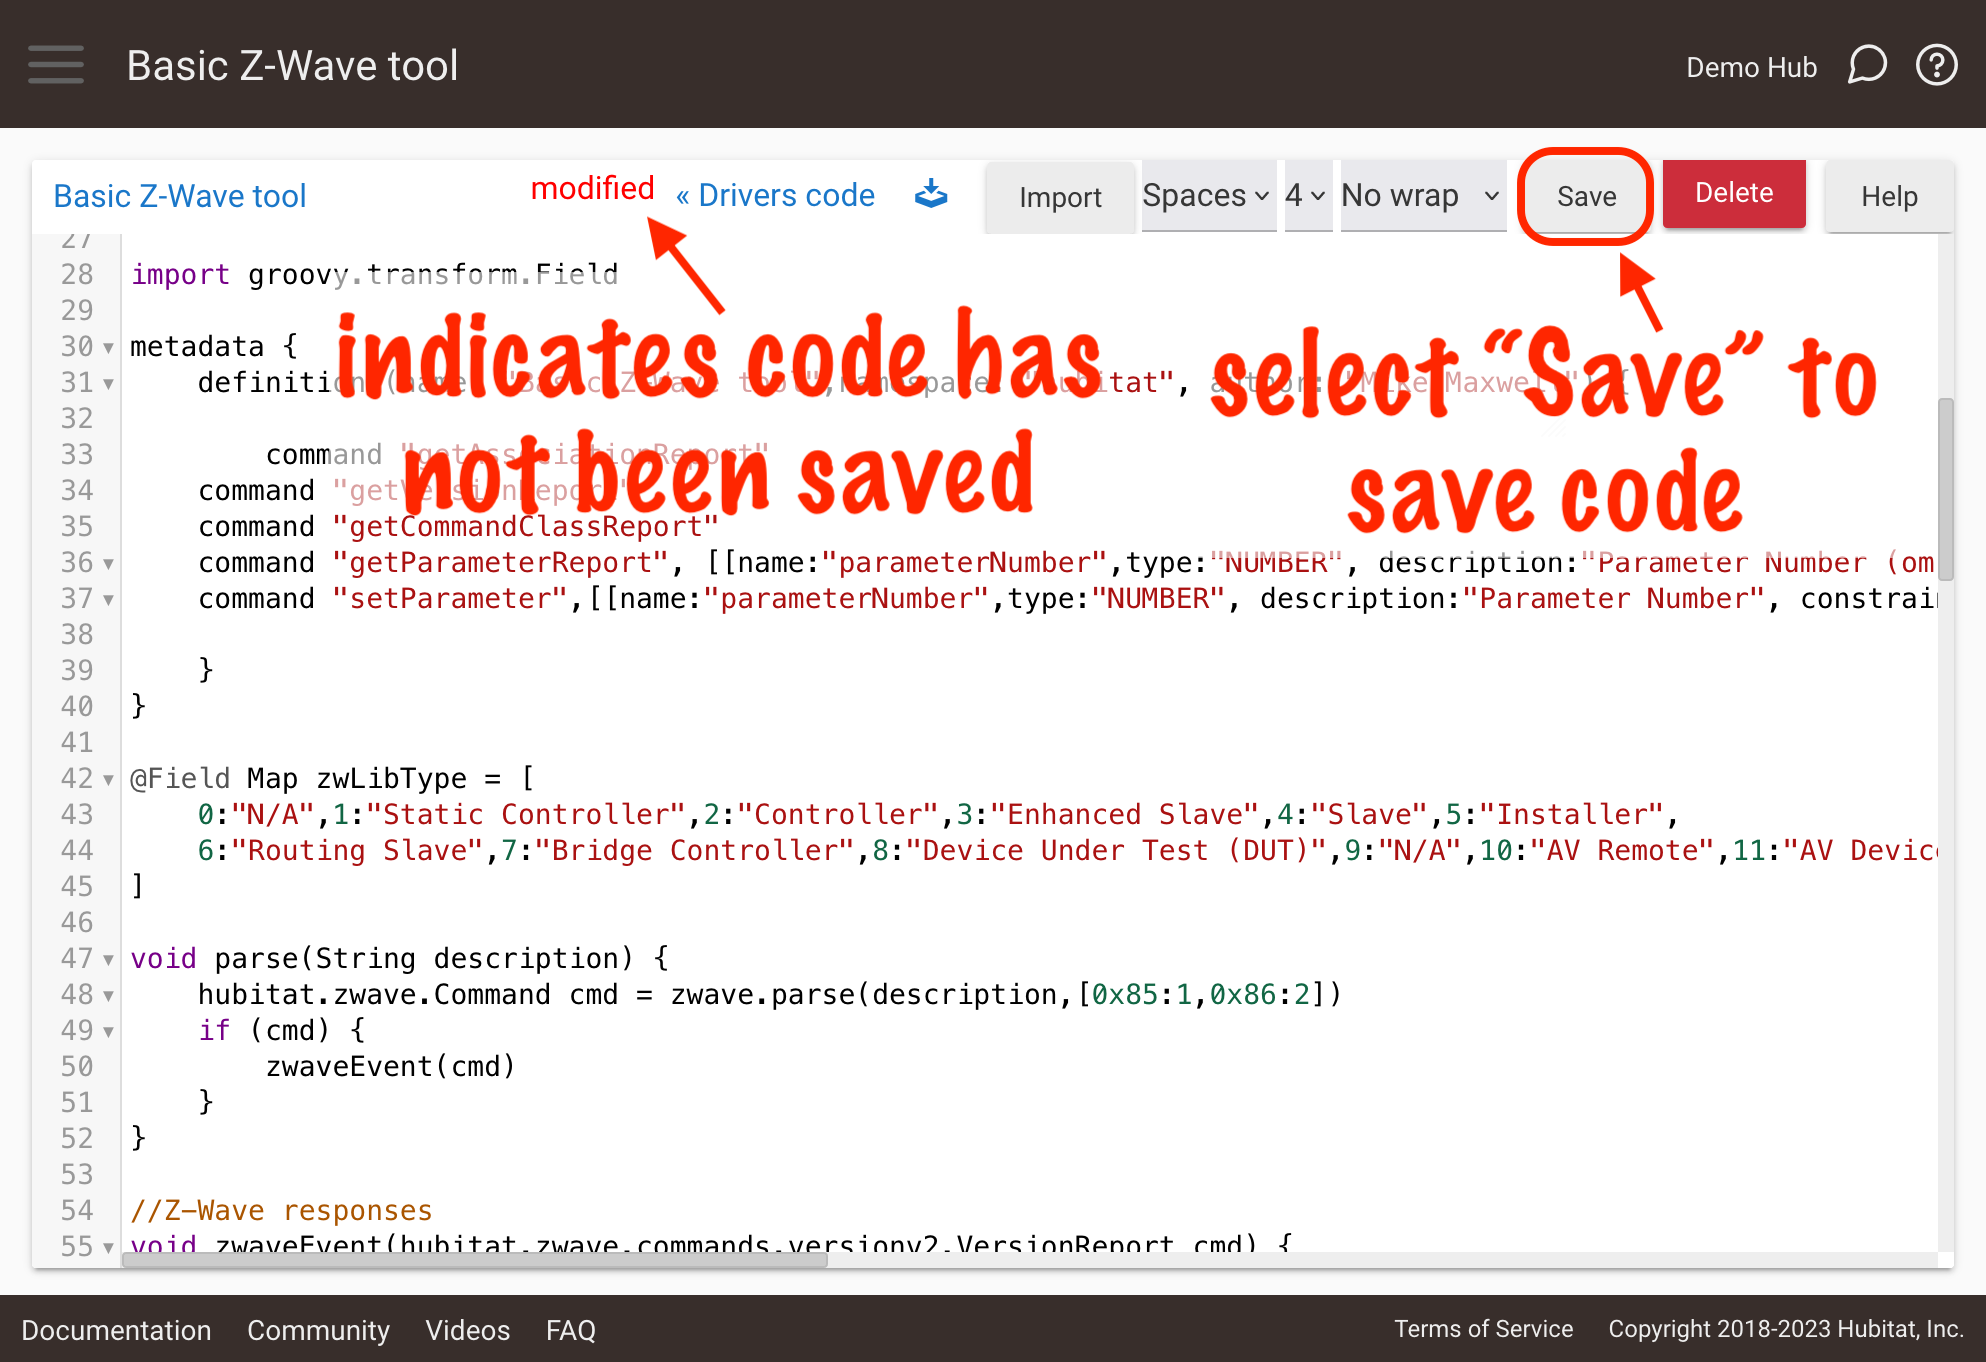
- Select the Save button towards the top right of the editor. Wait a few seconds, and if no errors appear, your driver code is saved.

Note: You may experience an error in this step. If you do, your driver will not save and it will not work. You will need to contact the developer or consult their instructions or other documentation to troubleshoot this problem, with the Community forum often being the best option (developers often make posts to discuss their work when sharing). It is usually best if you take a screenshot to help them diagnose the problem. Once the code is fixed, come back and try again.
¶ Loading your custom driver
Once your driver has successfully saved, you will need to update your device(s) with the new driver:
- For devices that have already been added to your hub, normally you will navigate to the device detail page and change the driver. See: How to Change the Driver Used by a Device.
- For Zigbee, Z-Wave, and Matter devices that have not yet been added to the hub, the driver should be matched on pairing, with the hub preferring user drivers over built-in drivers if both are available and the driver has a "fingerprint" that matches the device. Otherwise, it can also be switched manually after installation as described above.
- For virtual or LAN devices, you may need to either switch the driver (if the device has already been added; as described above) or create a "virtual" device using the driver, selecting the driver when adding the device. Some drivers may also be intended to be used by a "parent" app or device the developer may provide rather than created directly. The developer typically provides installation and usage instructions.