¶ Backup and Restore
It is a good idea to make a backup:
- before making changes to your hub (adding or removing devices; adding, removing, or significantly changing an app/automation; etc.)
- before performing a platform version upgrade.
This can be done on the Settings > Backup and Restore page.
¶ Back Up Your Hub
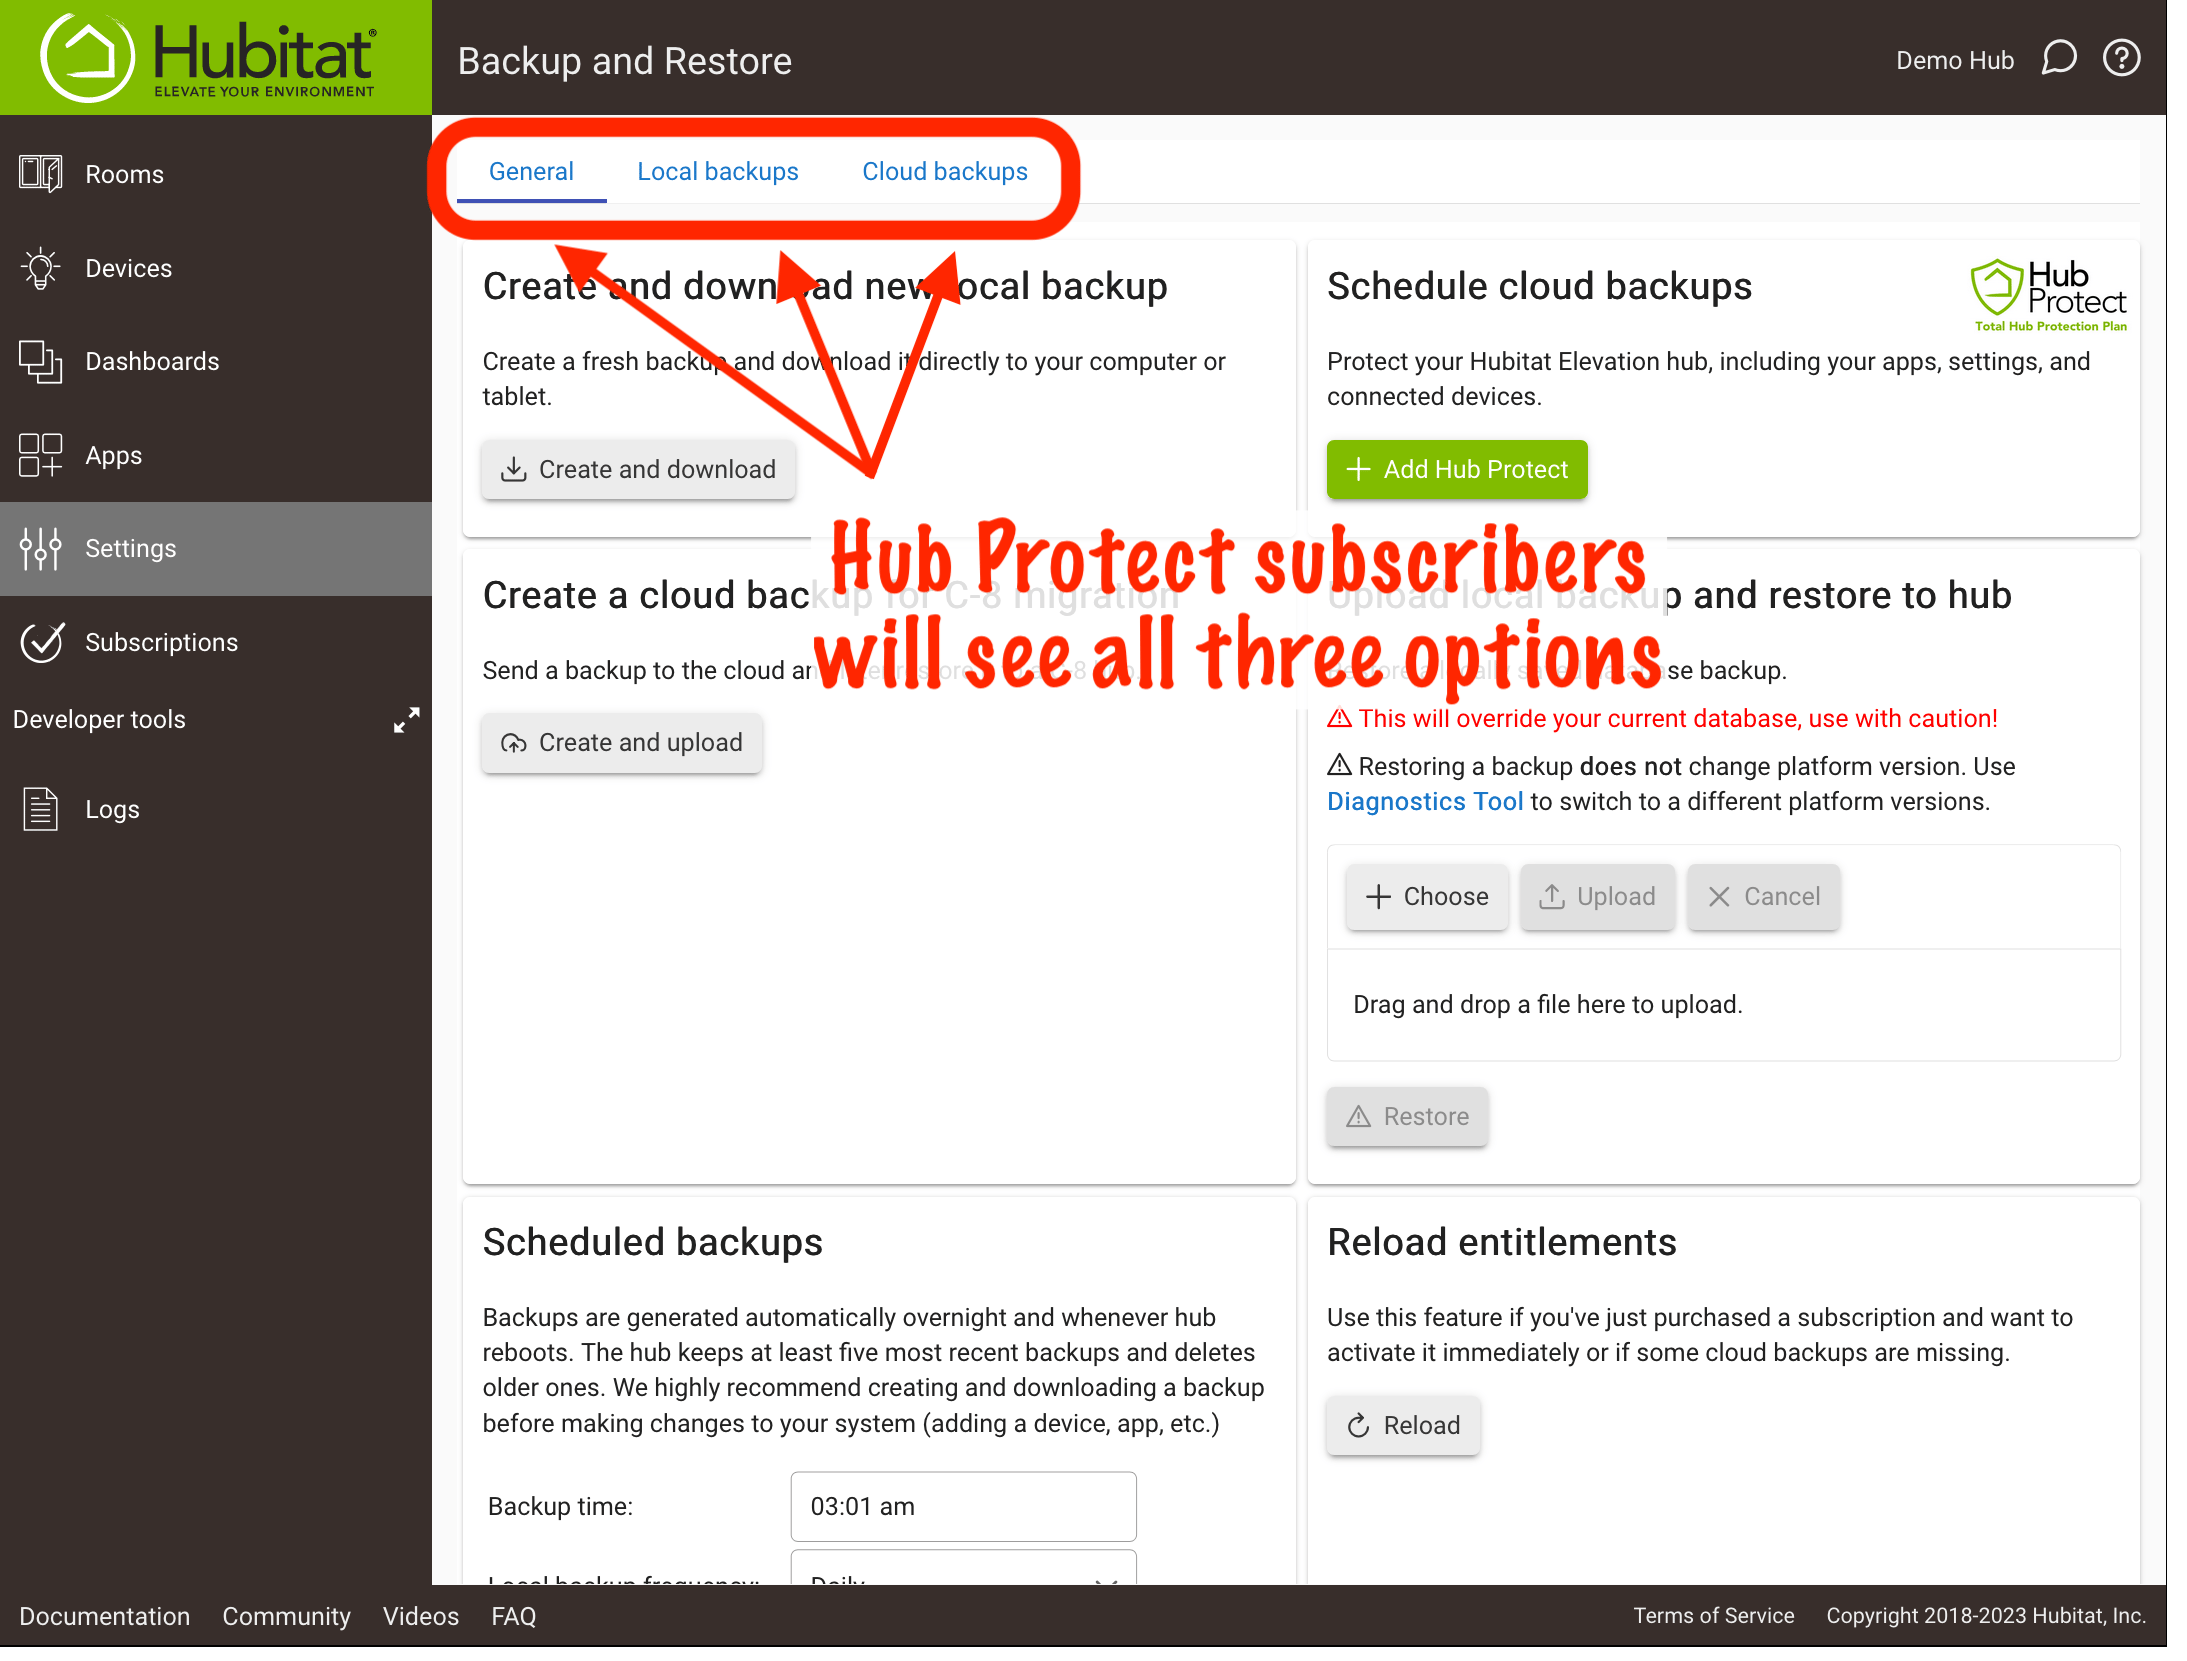
All users will see at least two tabs at the top of this page, General and Local backups. Some users will also see a Cloud backups tab. You will see this option only if you are a Hub Protect or Cloud Backup subscriber, both of which offer cloud backup service.
All users can perform local backups; see below for more information on each, including the differences between local and cloud backups.
¶ Local Backups
Your Hubitat Elevation hub automatically generates a local backup on every successful reboot and overnight shortly after 3 AM (local time) daily by default, unless a recent backup is already present or this schedule is changed (see the Scheduled backups section to change). You can also generate a new local backup at any time.
The hub will store around 10 to 13 local backups onboard (including up to 3 more from previous hub platform versions if available, but note that local backups do not include the platform software itself). You can also download a local backup for storage elsewhere on your own.
¶ To create and download a new local backup:
- Navigate to the Settings > Backup and Restore page.
- Ensure the General tab is selected at the top of the page.
- Under the Create and download new local backup heading, select Create and download to create a new local backup and save the file to your computer.
¶ To view existing local backups:
- Navigate to the Settings > Backup and Restore page.
- Select the Local backups tab at the top.
- A list of local backups will appear, showing the date created, the platform version on which they were created, the size, and actions allowing you to download, restore to, or delete this backup.
¶ Notes on local backups:
- Local backup includes the hub database only (settings, apps, device list, etc.). It does not backup files you have uploaded to your hub with File Manager. Please be sure you backup these files manually if needed.
- Local backup includes the device list but not the contents of the Z-Wave radio or Zigbee pairings. These devices will need to be re-paired if the backup is restored to a different hub or the corresponding radio is reset (radio resets do not happen as part of a soft reset). Local backups do include Matter configuration.
- You may backup and restore files from a local backup any time, but manual and automatic backup to the Hubitat cloud, including restore from cloud backup and Zigbee and Z-Wave radio migration, requires a Hub Protect or Cloud Backup subscription.
- We suggest periodically downloading a local backup for safekeeping, as the automatically saved local backups may not be accessible in the event of hub failure.
¶ Cloud Backups
With a Hub Protect or Cloud Backup subscription, you may set the time for when database maintenance and backup to the cloud will occur.
¶ To create a new cloud backup
- Navigate to the Settings > Backup and Restore page.
- Select the Cloud backups tab at the top of the page (you will not see this option without a Hub Protect or Cloud Backup subscription):
- Select Back up now to create a new backup and automatically save it to the cloud.
¶ To view existing cloud backups:
- Navigate to the Settings > Backup and Restore page.
- Select the Cloud backups tab at the top.
- All cloud backups associated with your My Hubitat account will be displayed in the list. Using the Show dropdown, you may filter this list to just backups created from this hub, backups created for hub migration (offered to new C-8 users migrating from previous versions), or all backups (the default).
¶ Notes on cloud backups:
- Cloud backups include the hub database plus Z-Wave and Zigbee radio and device information (except on some C-3/C-4 models; see Hub Protect documentation for details). File Manager contents are also included, subject to a 100 MB limit (it is recommended to back up these files manually regardless, but it is necessary — if you want to restore them — if you exceed this limit).
- Being able to make cloud backups requires a Hub Protect or Cloud Backup subscription. (In contrast, all users may create and restore local backups.)
- You can change the time and frequency of automatic backups on the General tab.
¶ How to Restore from a Backup
If you want to go back to a previously saved backup, Hubitat Elevation makes it easy.
- Navigate to the Settings > Backup and Restore page.
- Select the Local backups or (if available) Cloud backups tab, depending on which type of backup you want to restore.
- Find the desired backup in the list and select the "Restore" (curved arrow) icon.
- For restore from cloud backups only, you will be offered to restore Z-Wave, Zigbee (C-8 or C-8 Pro only), and File Manager; choose you desired options.
- Any restore (local or cloud, regardless of selected options) will, at minimum, overwrite your existing hub database. (The contents of two hubs cannot be merged.)
- Alternatively, to restore a local backup previously download to your computer, navigate to the General tab, locate the Upload local backup and restore to hub section and select Choose or drag a file to the box, then select Upload.
¶ Restoring a previous hub platform version
Hub backup data notes the platform version on which the backup was created. However, hub backups do not contain the platform version itself.
Hub backups include only your hub database (and optionally other contents in certain circumstances, as described above). Backups filenames are labeled with the firmware version they were created on for reference. However, they do not contain the actual hub platform software itself. Restoring a backup made under a previous platform version will not restore that platform version.
If you want to restore the hub platform to a previous version, use the Hubitat Diagnostic Tool.
In rare cases, files created with newer platform versions cannot be restored to hubs with older platform versions; the release notes for the new platform version will note when this is the case.
TIP: The Diagnostic Tool can also be used to download a hub backup if the regular hub interface is not accessible for any reason.