¶ Devices (User Interface Page)
To access the Devices page, select Devices from the left-side menu in the hub interface:
This page allows you to:
- See a list of all devices on your hub, along with a summary of key information about them
- Navigate to the device detail page for any device by selecting the link (the label or name for the device in the list)
- Add a new device to your hub by using the Add Device button
¶ Device View Styles
The Devices table can be presented in one of two view styles, list or grid. These can be changed using the List or Grid option in above the table or list, towards the top of the page.
List view, also known as table view, can show more information and is the default for desktop/laptop and larger displays. Grid view is the default on mobile displays. It does not show as much information, but it can be can be an easy way to view a dashboard-like overview of devices and may be more touchscreen-friendly.
¶ Devices Table
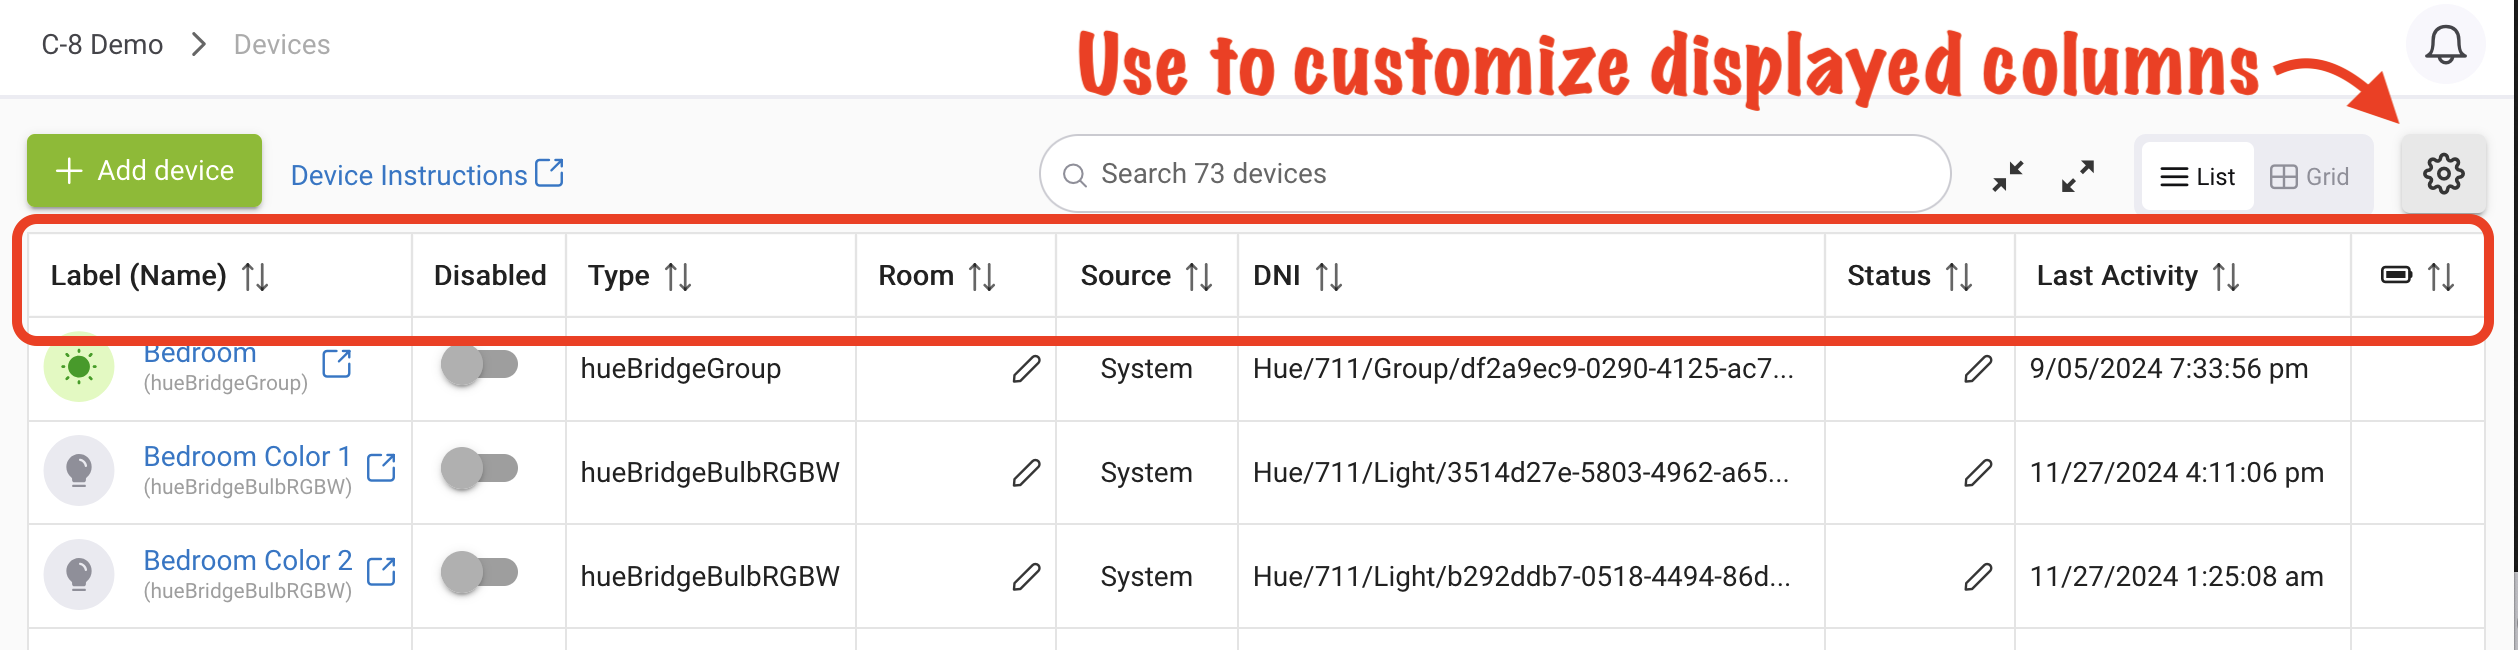
The Devices table in list view shows a complete list of all of the devices in your system. One possible view includes the following columns:
- Disable: Disables the device, i.e., stops the driver code from running (see below for more)
- Name: The device label and/or name (the name appears in parentheses and will be smaller than the label if both are present; the label will be used a the display name in apps if both are specified). These can be set by you on the device detail page.
- Type: The name of the driver assigned to the device
- Room: The room the device is assigned to, if any
- Source: The type of driver assigned to the device, with "System" referring to built-in drivers provided by the hub and "User" to custom drivers
- DNI: displays the device network ID, the purpose of which can vary by device (it is the node ID for Z-Wave devices; the 16-bit/short ID for Zigbee devices; and could be a MAC or IP address for some LAN integrations or a random GUID, user-assigned value, or parent-assigned ID for virtual, other LAN or cloud, or certain child devices)
- Status: Shows the most recent value for a specific attribute if the Default current state preference (previously called Status attribute for Devices/Rooms) is configured (also accessible from the edit icon in this column if the icon is enabled). For example, for a switch or dimmer, you could select switch as the attribute, which will display the last state, on or off.
- Last Activity: The date/time of the last registered activity of the device
The page also provides additional options and features:

- Add Device button (H) to add a device and view inclusion, pairing, or other instructions for devices for which we have documentation (J; but consult documentation from your device manufacturer to be certain).
- Search box (K): the device list will be filtered to only those devices that contain the specified text in any column (hint: use this to easily find a device by name or label; use the "X" as an easy way to clear any entered text)
- Expand/collapse child devices: select to collapse (L) or expand (M) all parent/child listings in the table, alternating between showing only the parent device or the parent device and all children (the same icons can also be selected on any parent device in the list to hide or show all child devices for that device)
- Switch between list and grid view (N)
- Display settings (P): Allows hiding or showing columns in list view or switching between list and grid view. Many of these options allow hiding/showing columns described above. Other options include:
- Display device ID: shows the hub-assigned ID (not the DNI) for the device, as you might use with an app like Maker API
- Show device status: shows the Status column and, if configured for the device as described above, the current value for that attribute
- Show device status configuration button: shows the pencil (edit) icon to allow easy access to select or change which attribute this is
- Compact view mode: applies slightly less spacing within rows to allow more devices to be displayed
- Show battery level: shows the current battery level of the device (as seen under Current States on the device detail page for the device, if this attribute is available for that device); low battery levels will be highlighted in orange or red automatically
- The table can also be used to disable certain devices (see below)
¶ Disable Device Drivers
Rather than removing a device driver you suspect may be causing a problem with your hub, you can simply disable it. When a device is disabled, no driver code associated with that device will run. This may be useful for troubleshooting.
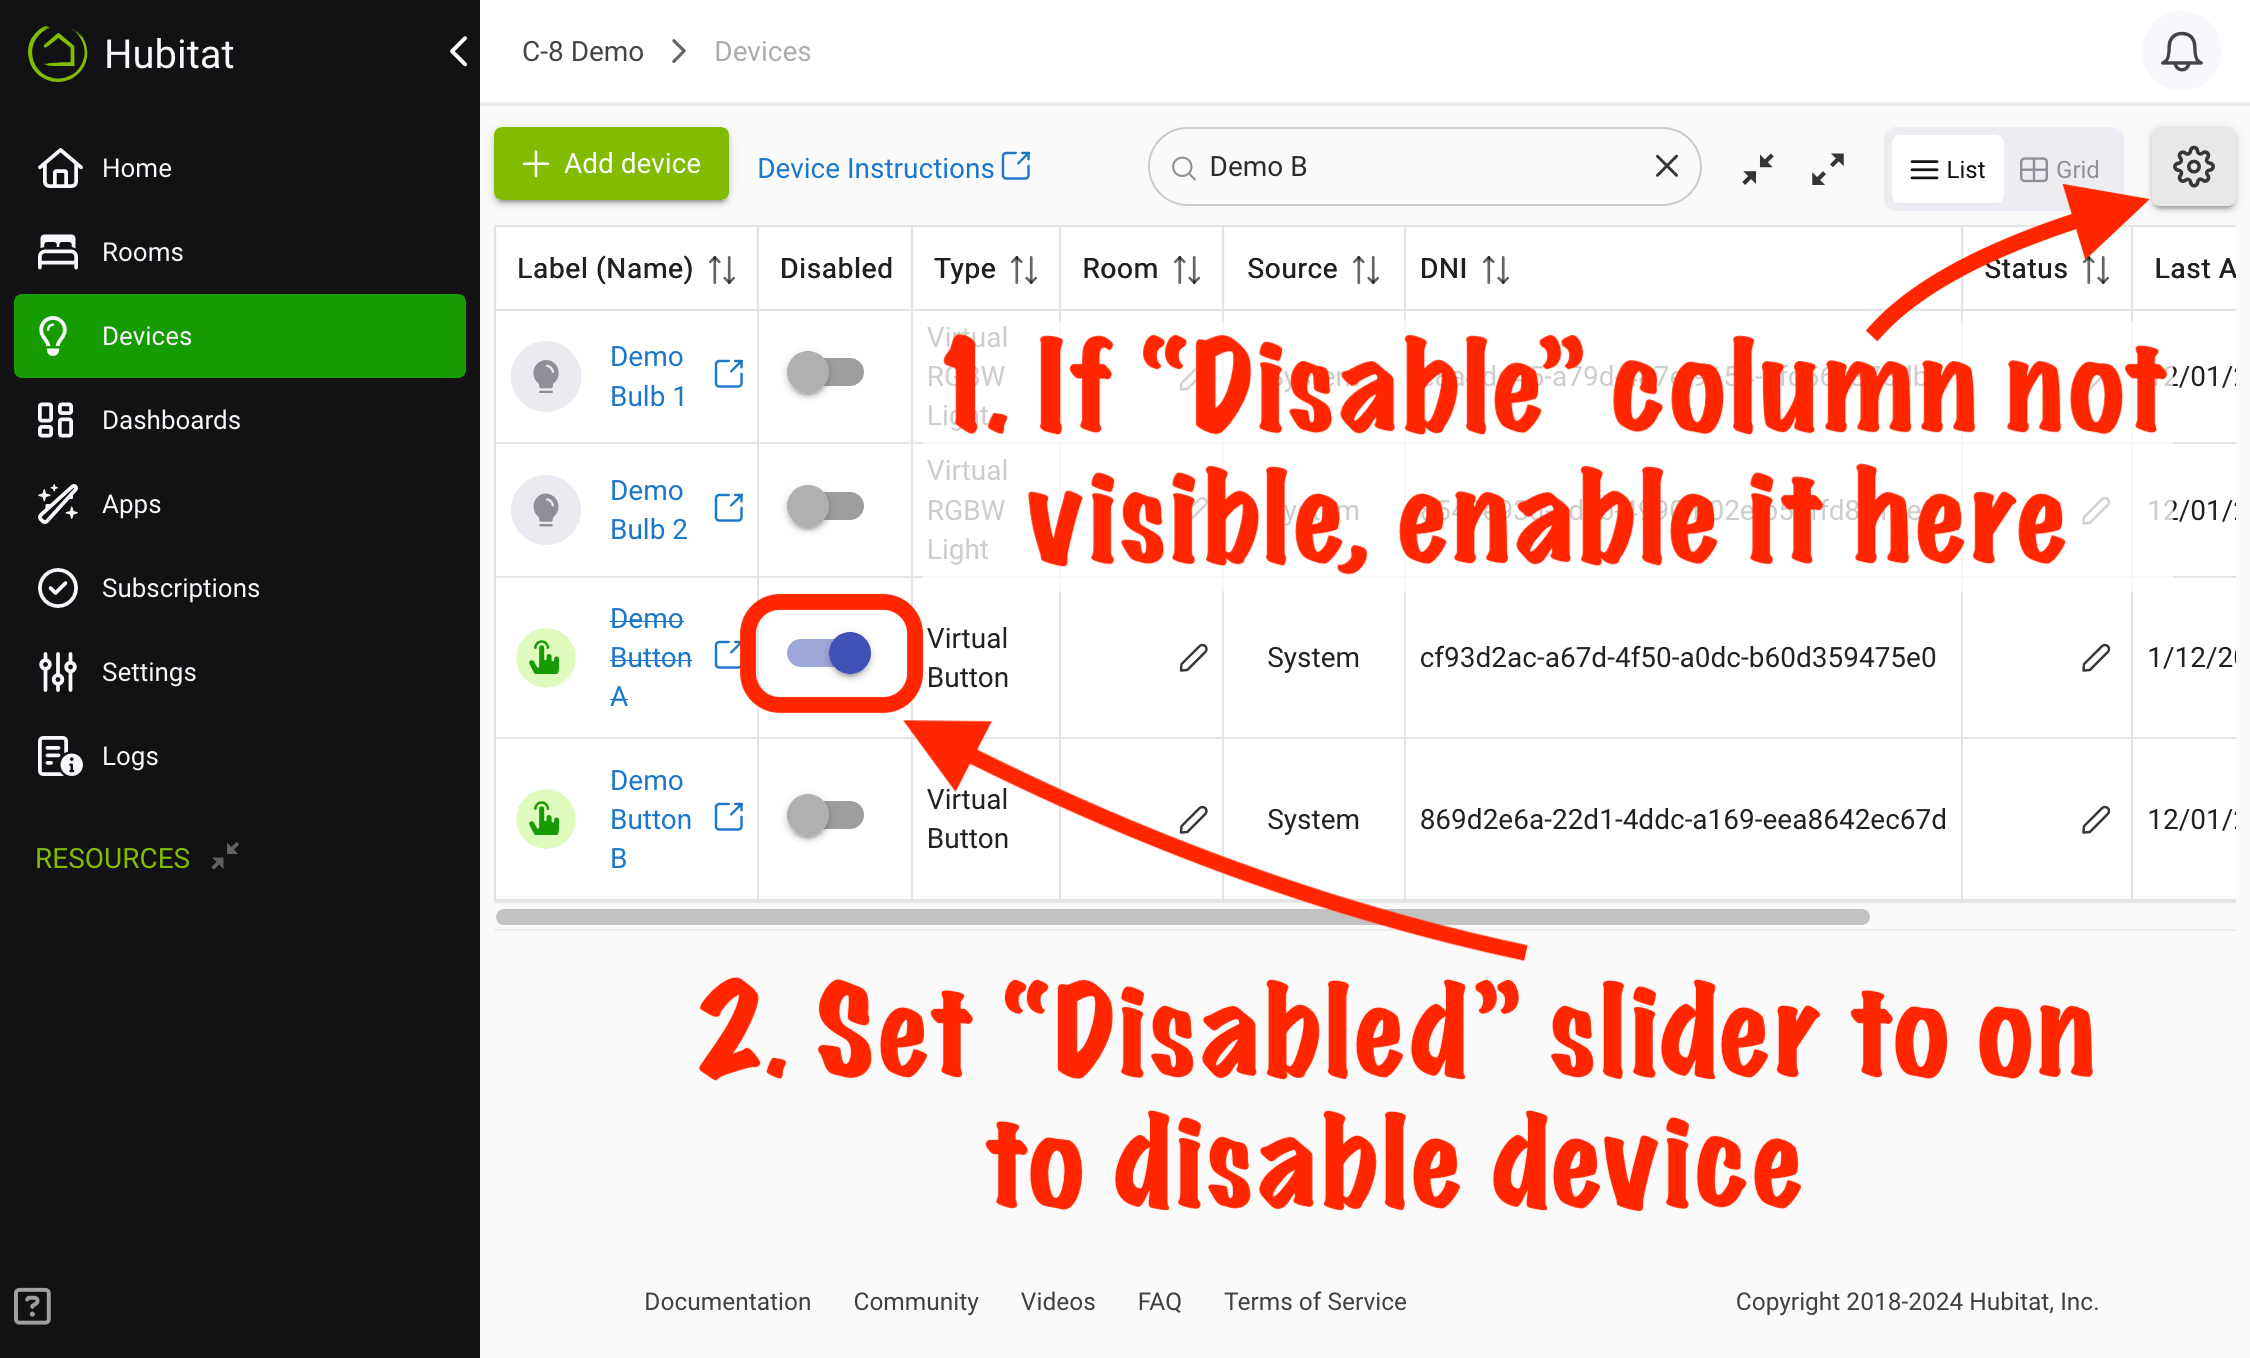
- If you do not see a Disable column in your Devices list, select the Display settings icon and enable this column.
- In the Disable column, check the box next to the device to toggle the disabled/enabled state of the device.
- A checkmark indicates a disabled device.
- A blank box (default) indicates a device that is not disabled.
Devices can also be disabled using the Disable button on the device detail page.
NOTES:
- The column can be shown or hidden at any time by using the Display settings icon as described above
- The Disable column is only available in list view, not grid view (grid view does not show the disabled/enabled status of a device)